COMET (user backup)
Aim: Explaining how to set up the Nikhef userbackup for Windows, macOS and Linux
Introduction
'Comet Userbackup' is a service that Nikhef offers to back up the data on your laptop to the Nikhef data center
IMPORTANT
All your data thats stored on our server is encrypted. The only way to access the data is with your username and password. The CT department can only see the encrypted files and can not access your data. In the 'My account' settings you can find the option 'Allow administrator to reset password'. This option is enabled by default. This will allow the helpdesk to assist you if you lose your password. You are free to change this setting, but be aware! If you have disabled this setting there is no way for us to recover your data if you lose your password.
Prerequisites
- Nikhef account
- COMET account (please contact the helpdesk for this)
Installation
Below is explained how you can use COMET with Windows 10 and 11.
| Installation | Images |
|---|---|
| Go to the COMET userbackup website and log in with the username and password you received from the helpdesk. | 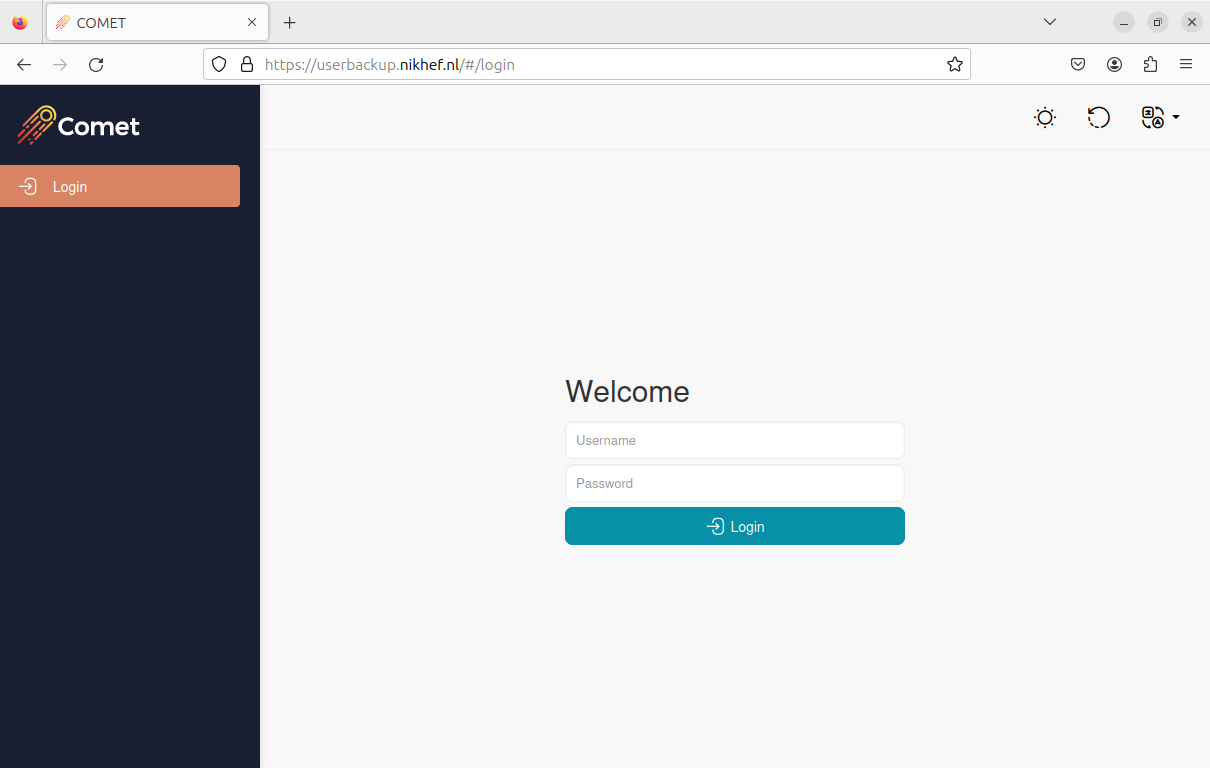 |
| Go to 'Downloads' at the top right. | 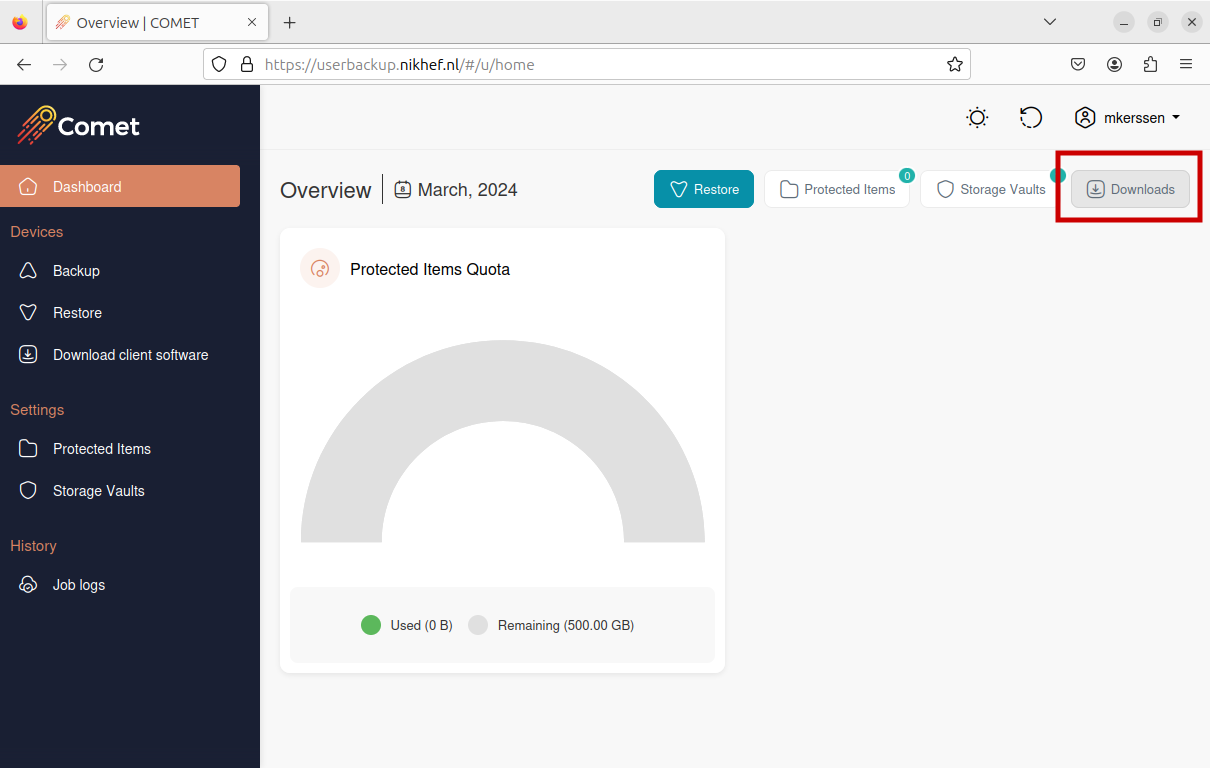 |
| In nearly all cases 'x86_64' is the correct installation file. If you are unsure which version you need, please pick 'x86_64'. | 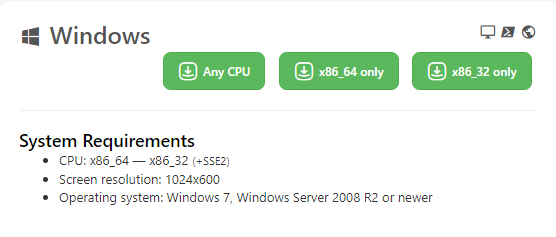 |
| Unzip the downloaded file and run 'install.exe'. | |
| Windows may prompt you to confirm that you wish to install it. If so, please allow the software installation. Nikhef Windows laptops includes Symantec Endpoint Protection, which notifies you when software installation begins. Please approve the file as shown in the screenshot. For Windows Defender, click 'More info' then 'Run anyway'. | 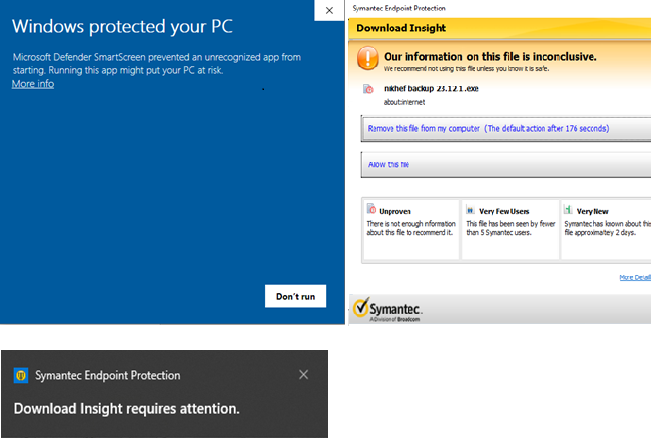 |
| Run the software after installing and enter username and password provided by the helpdesk. | 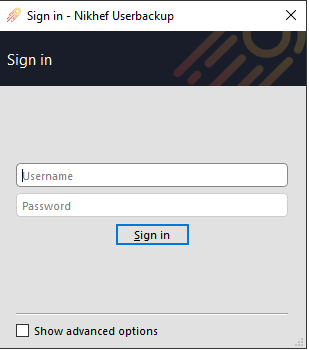 |
| If login is successful, the software will prompt you to enter a name for your backup profile. Your device name is filled in by default, but you can adjust it as needed. When satisfied, please click on 'Register', and on the next screen, click 'Next >'. | 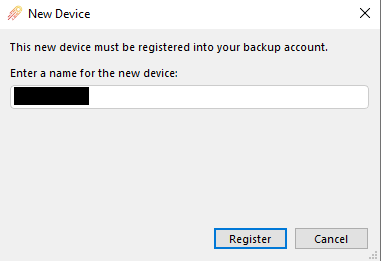 |
| Choose the folders you wish to backup and click 'Next >' to proceed, it is also possible to backup specific files or folders by clicking the 'Custom' tab. | |
| No adjustment is needed in the following prompt, proceed by clicking 'Next >'. | |
| By default your files get backed up every hour. But if you wish to change the frequency, click the pencil icon to customize your settings. When satisfied proceed by clicking 'Next >' twice, click 'Finish', and finally click 'Backup' to finalize the backup. | 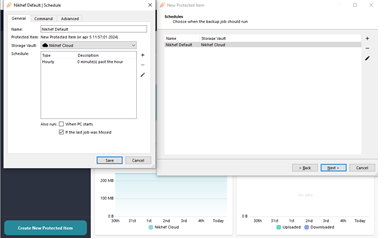 |
| Your backup profile can now be found on the left of the application and can also be found on the web application COMET userbackup website. | 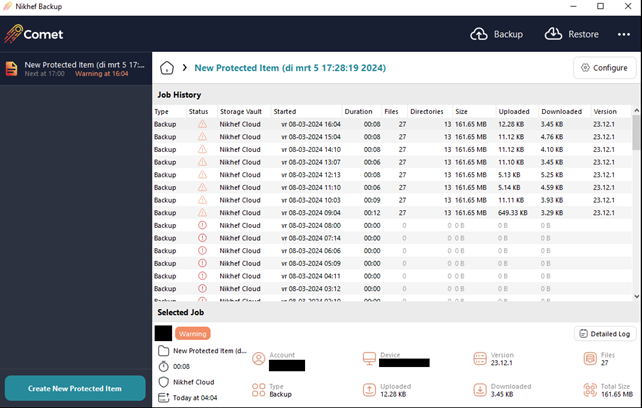 |
Below is explained how you can use COMET with macOS.
| Installation | Images |
|---|---|
| Go to the COMET userbackup website and log in with the username and password you received from the helpdesk. | |
| Go to 'Downloads' at the top right. | |
| Depending on the processor type that your Apple device has, choose between ' x86_64' or 'Apple silicon'. Please refer to Apple support website or click “About This Mac” to find which processor your device has and choose accordingly. | 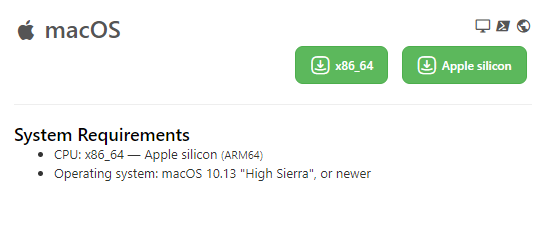 |
| Run the downloaded DMG file. | |
| After installing the software, run it and enter the username and password provided by the helpdesk. | |
| After logging in the software will ask you to grant Userbackup Full disk Access. Please follow the provided instructions. | 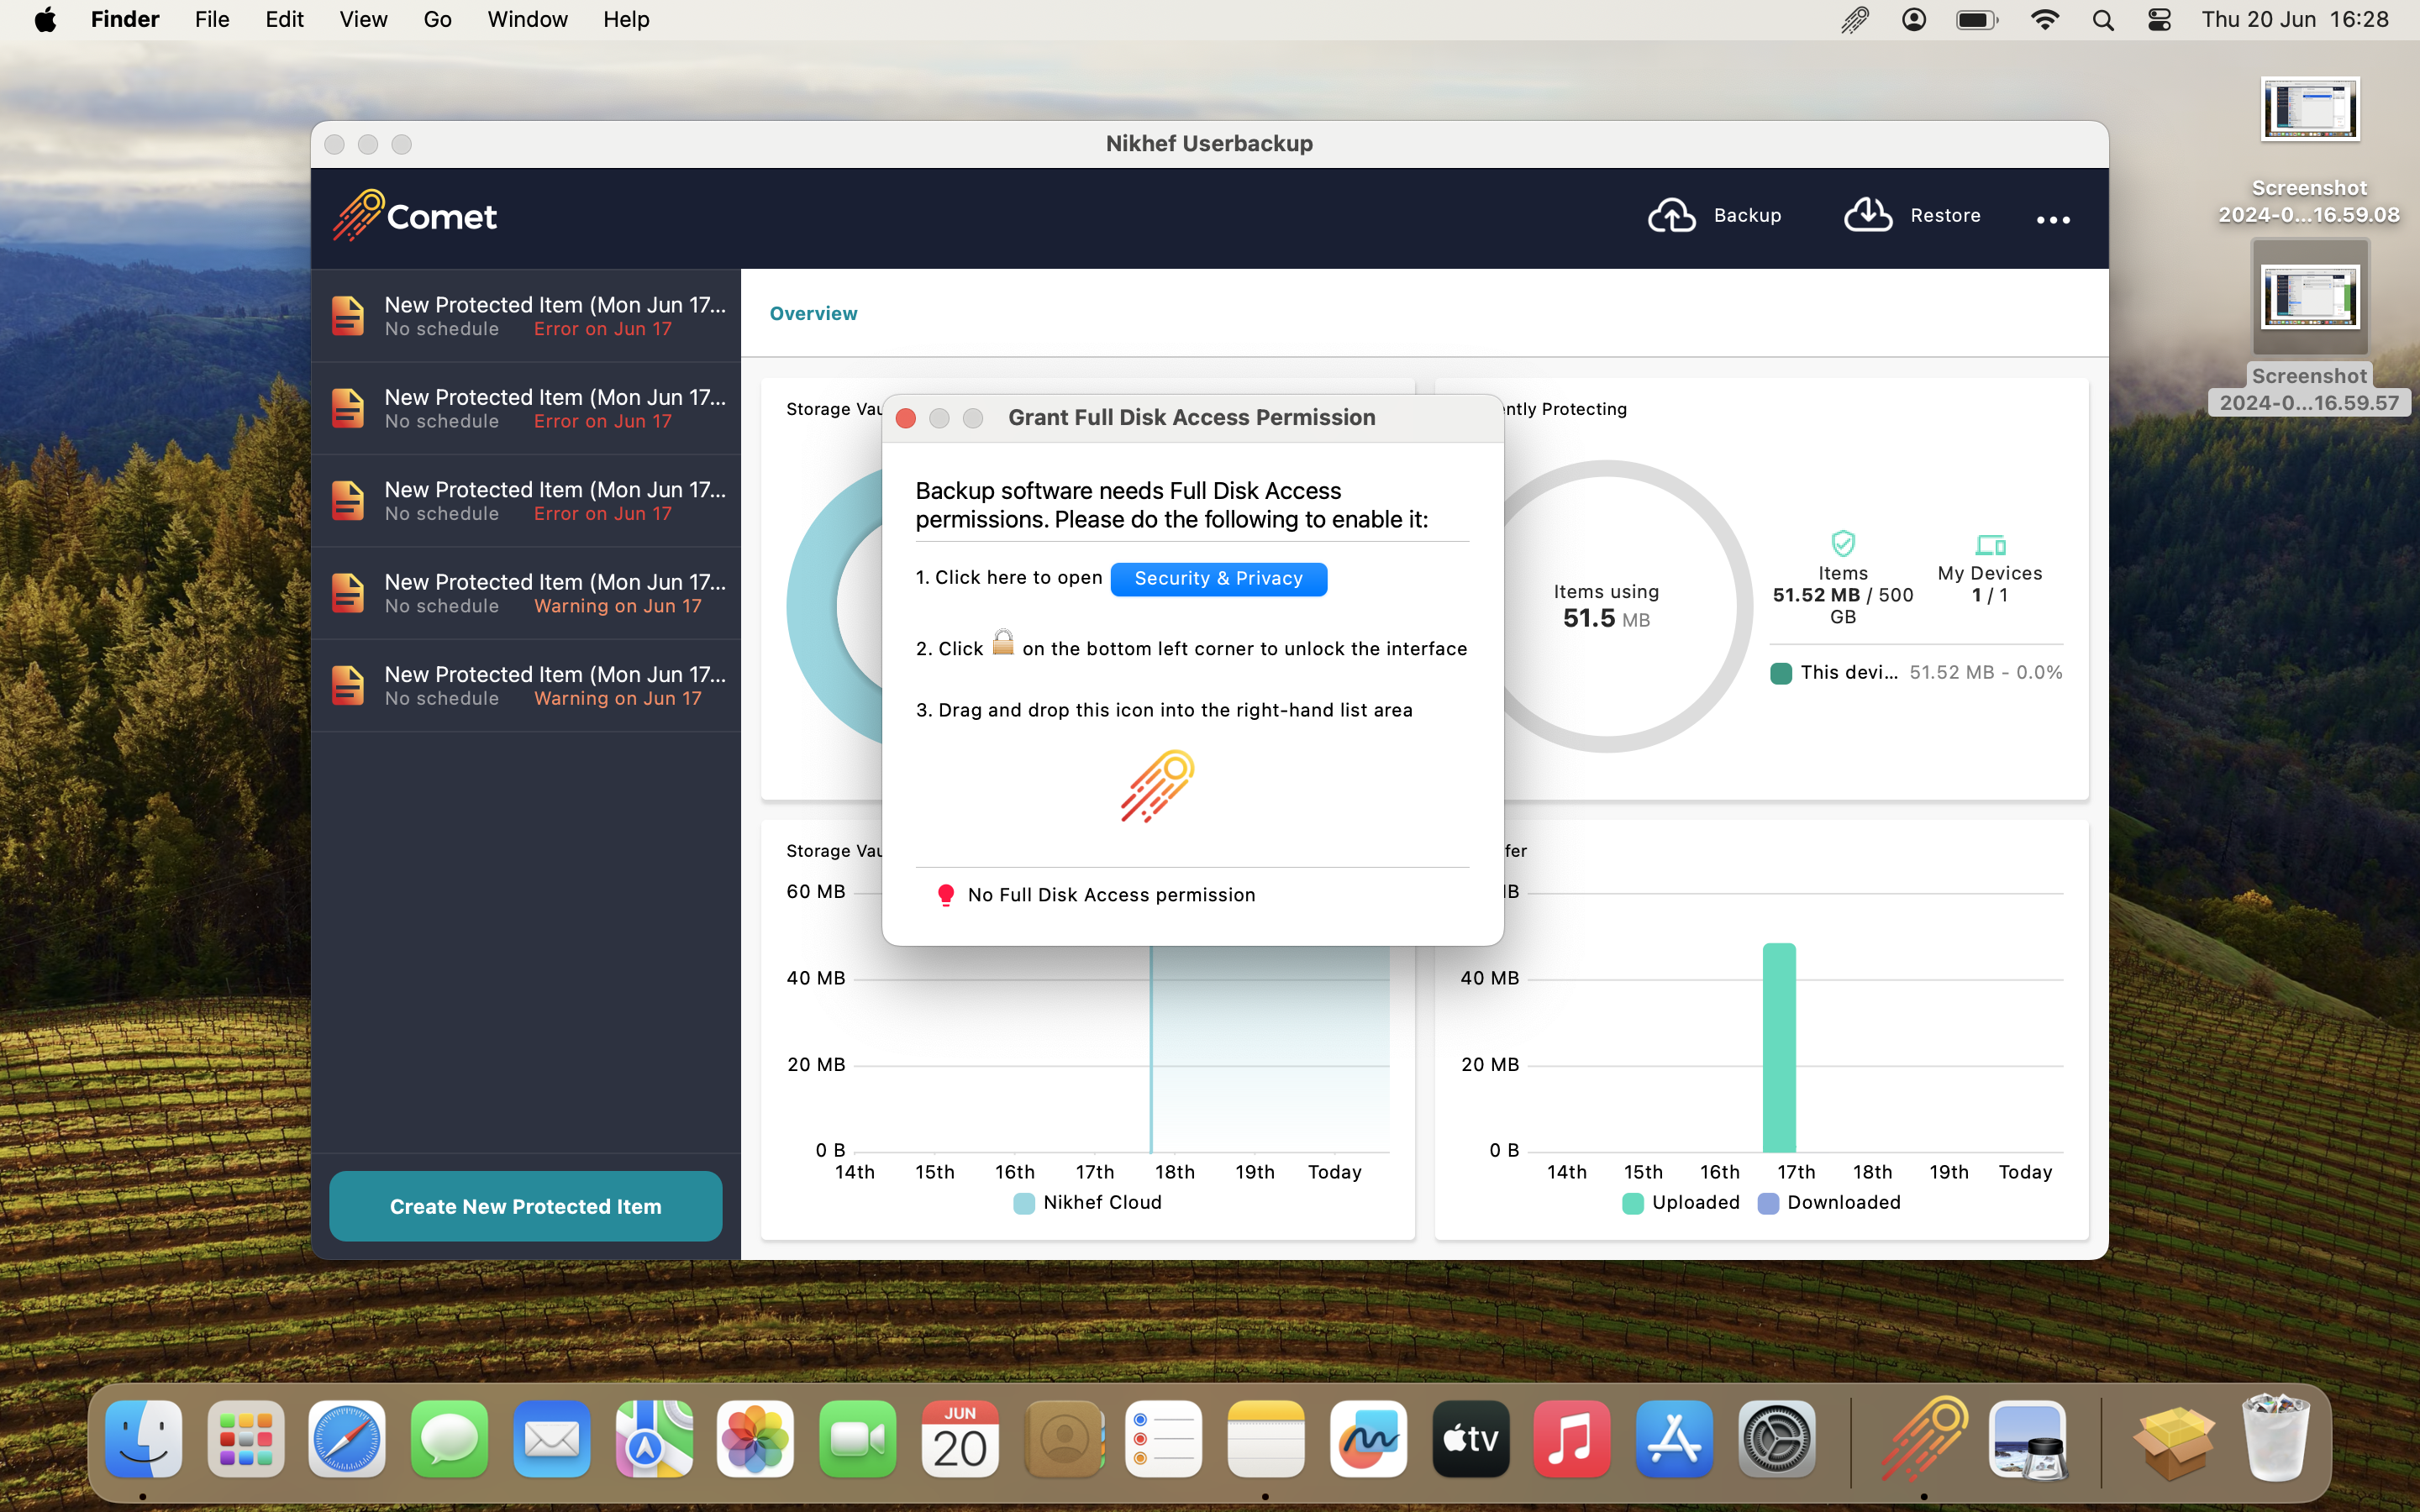 |
| When access has been given, you will notice another item in this list called 'backup-tool'. In order for Userbackup to function, this has to be given access as well. If access is granted, follow the steps below or find more detailed instructions in the link provided at the end of this guide. | 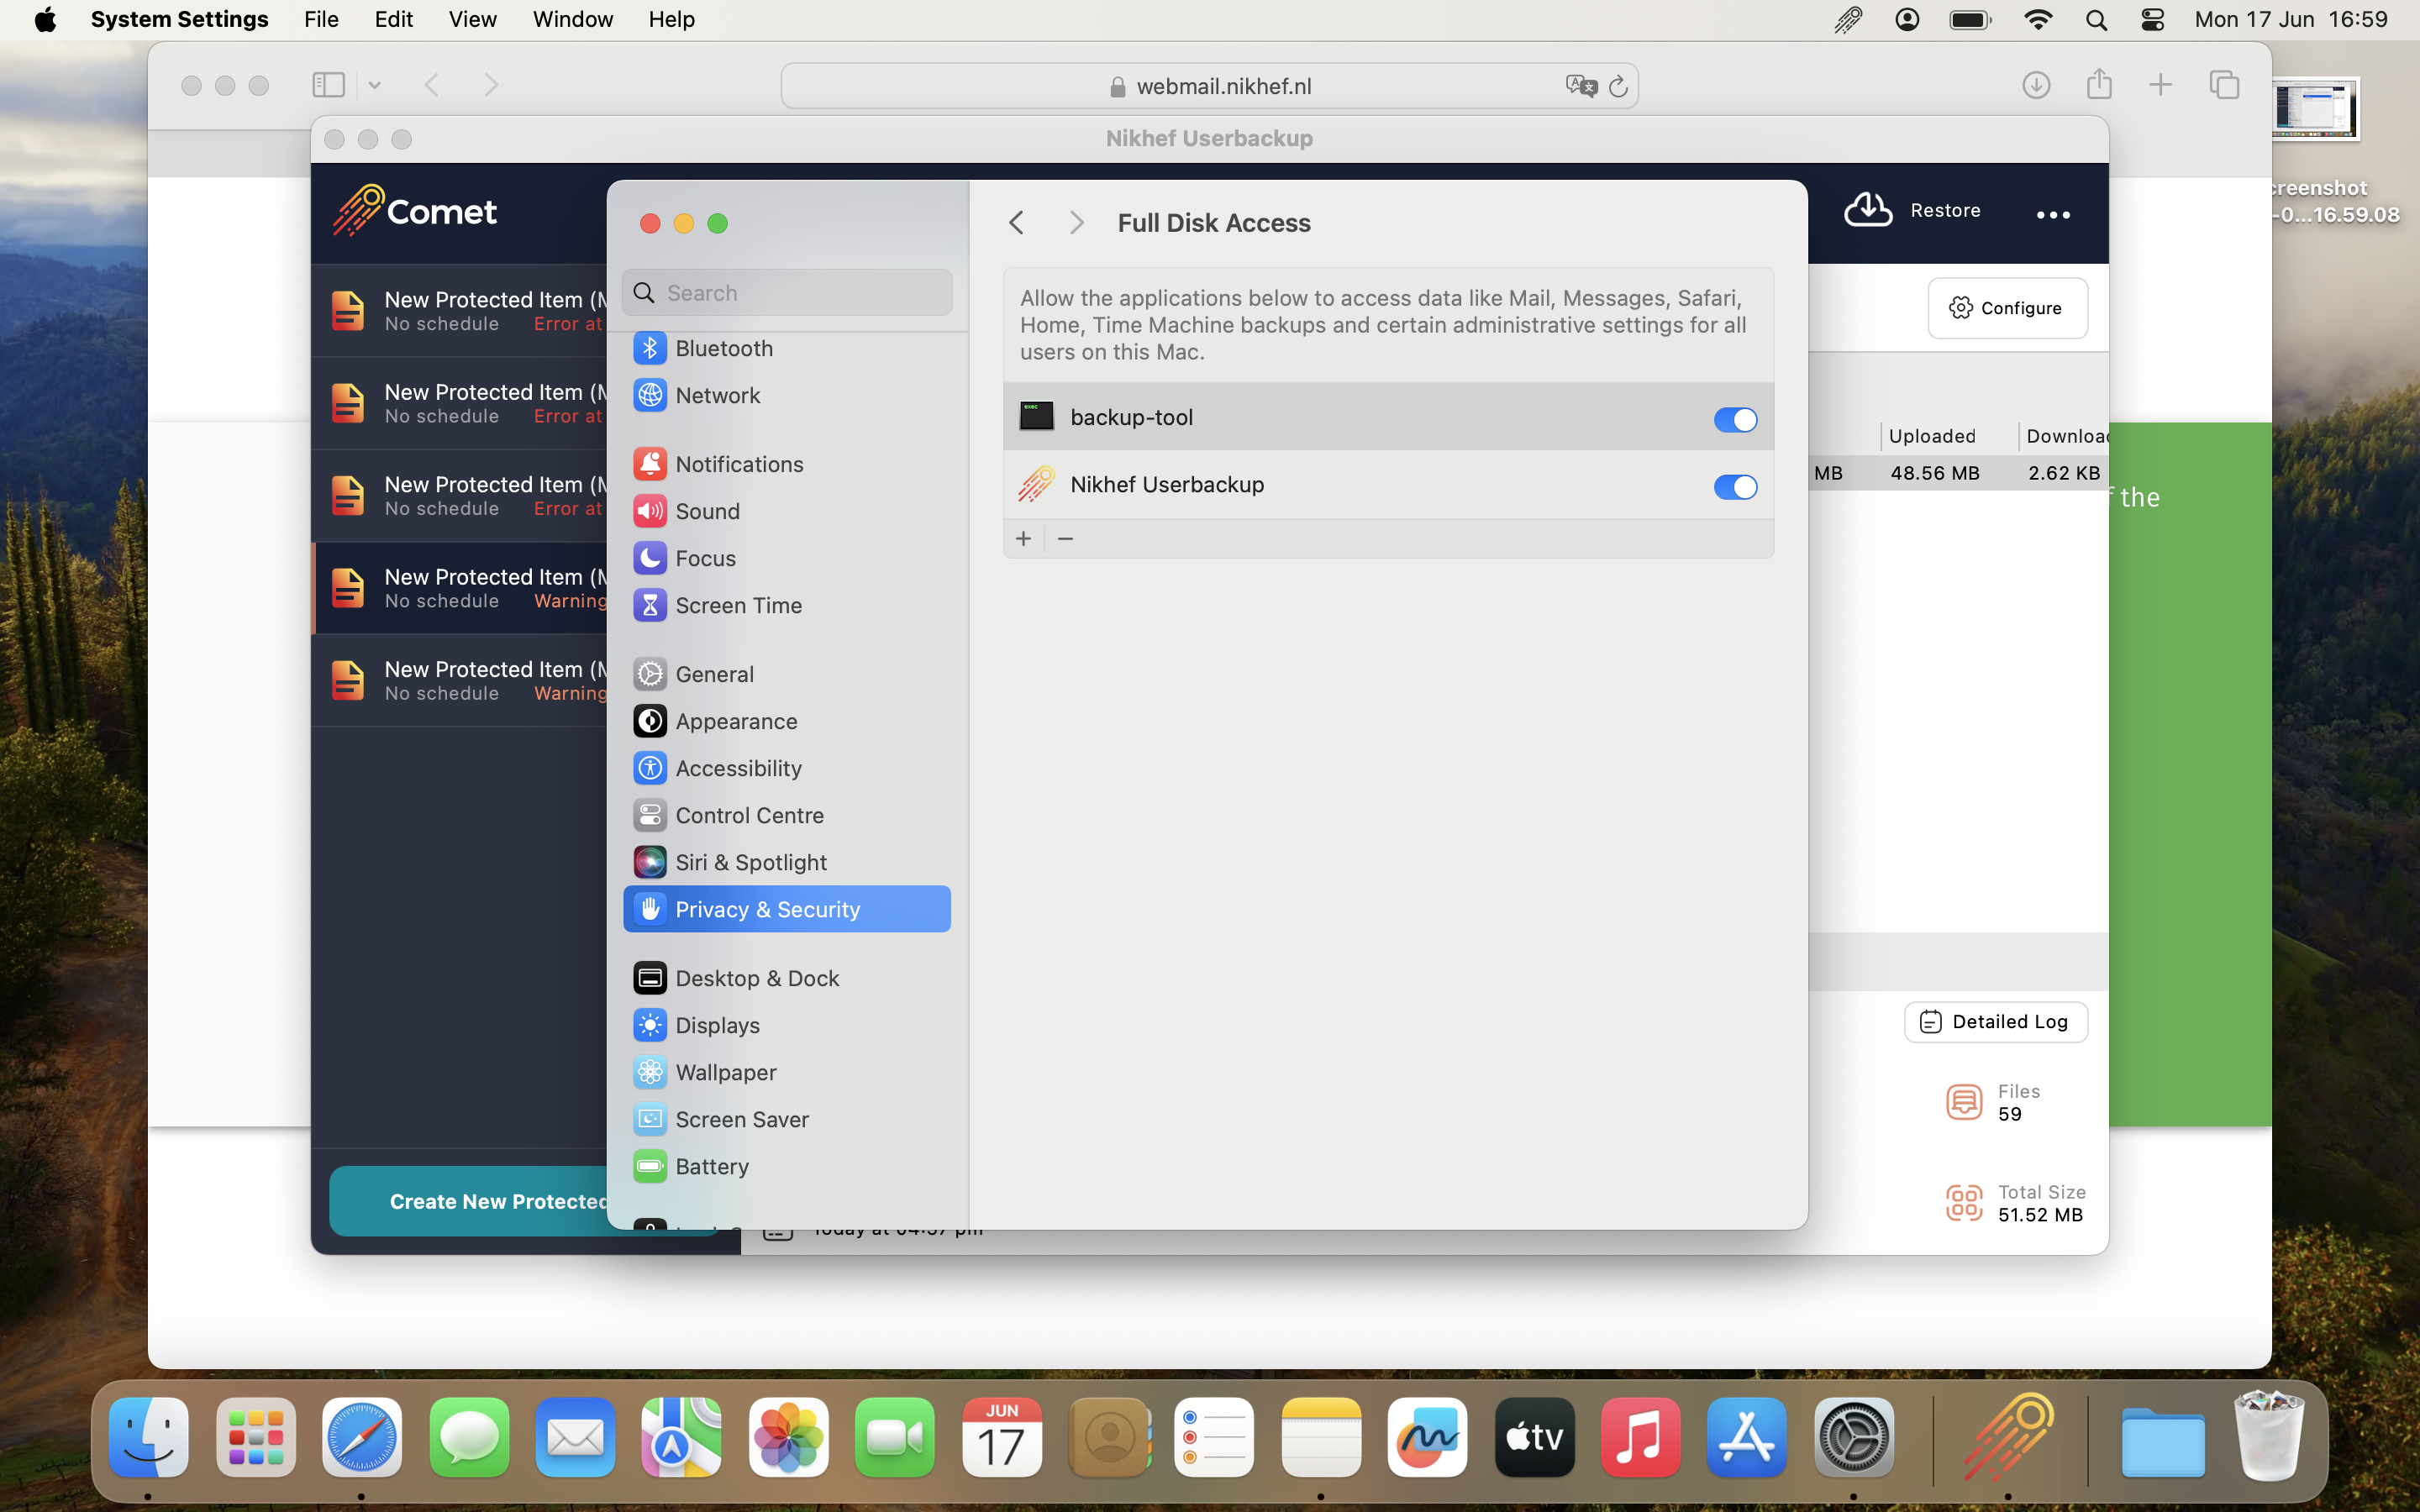 |
| If login is successful, the software will prompt you to enter a name for your backup profile. Your device name is filled in by default, but you can adjust it as needed. When satisfied, please click on 'Register', and on the next screen, click 'Next >'. | |
| Choose the folders you wish to backup and click 'Next >' to proceed, it is also possible to backup specific files or folders by clicking the 'Custom' tab. | |
| No adjustment is needed in the following prompt, proceed by clicking 'Next >'. | |
| By default your files get backed up every hour. But if you wish to change the frequency, click the pencil icon to customize your settings. When satisfied proceed by clicking 'Next >' twice, click 'Finish', and finally click 'Backup' to finalize the backup. | |
| Your backup profile can now be found on the left of the application and can also be found on the web application COMET userbackup website. | |
Below is explained how you can use COMET with Ubuntu (Debian based). We use the website to manage the backup, but a GUI is also available. Here we focus on the web interface but we will also show how to start the GUI.
| Installation | Images |
|---|---|
| Go to the COMET userbackup website and log in with the username and password you received from the helpdesk. | |
| Go to 'Downloads' at the top right. | |
| Now choose to download the .deb file. | 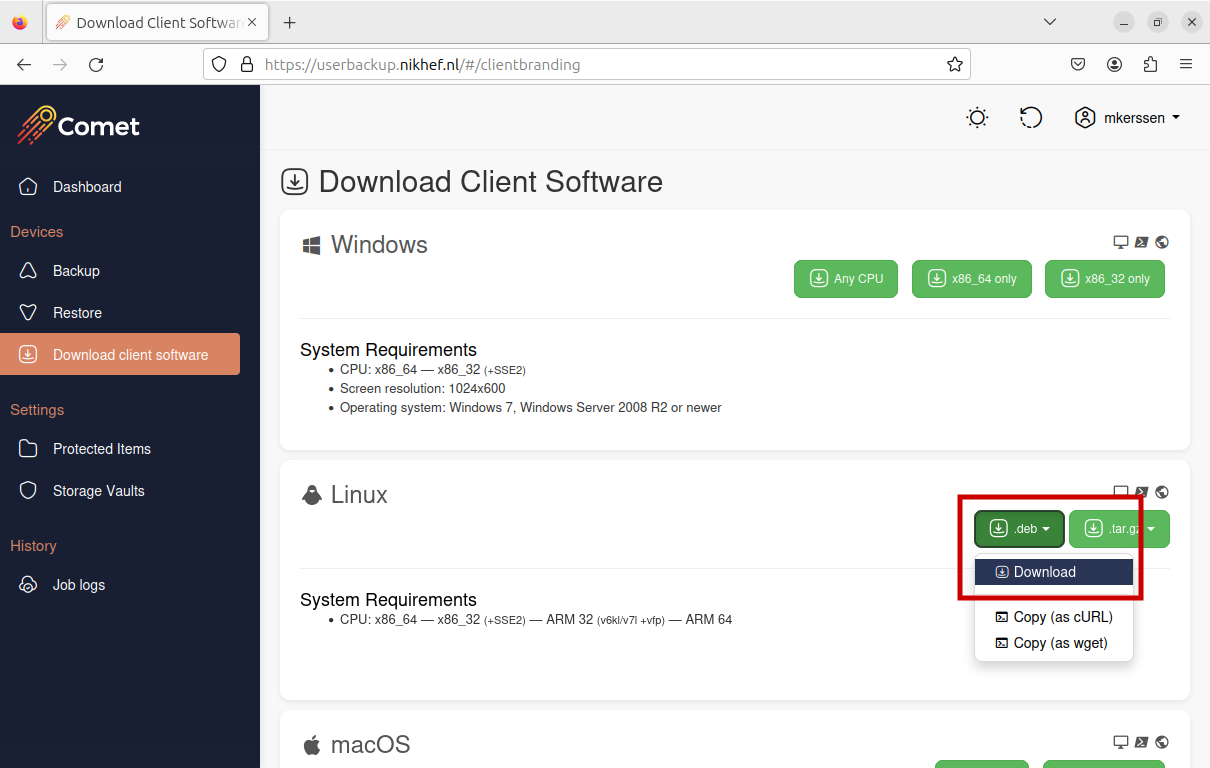 |
Open the terminal and navigate to the folder where you downloaded the file. Then start the installation by running sudo apt install ./<file name> | 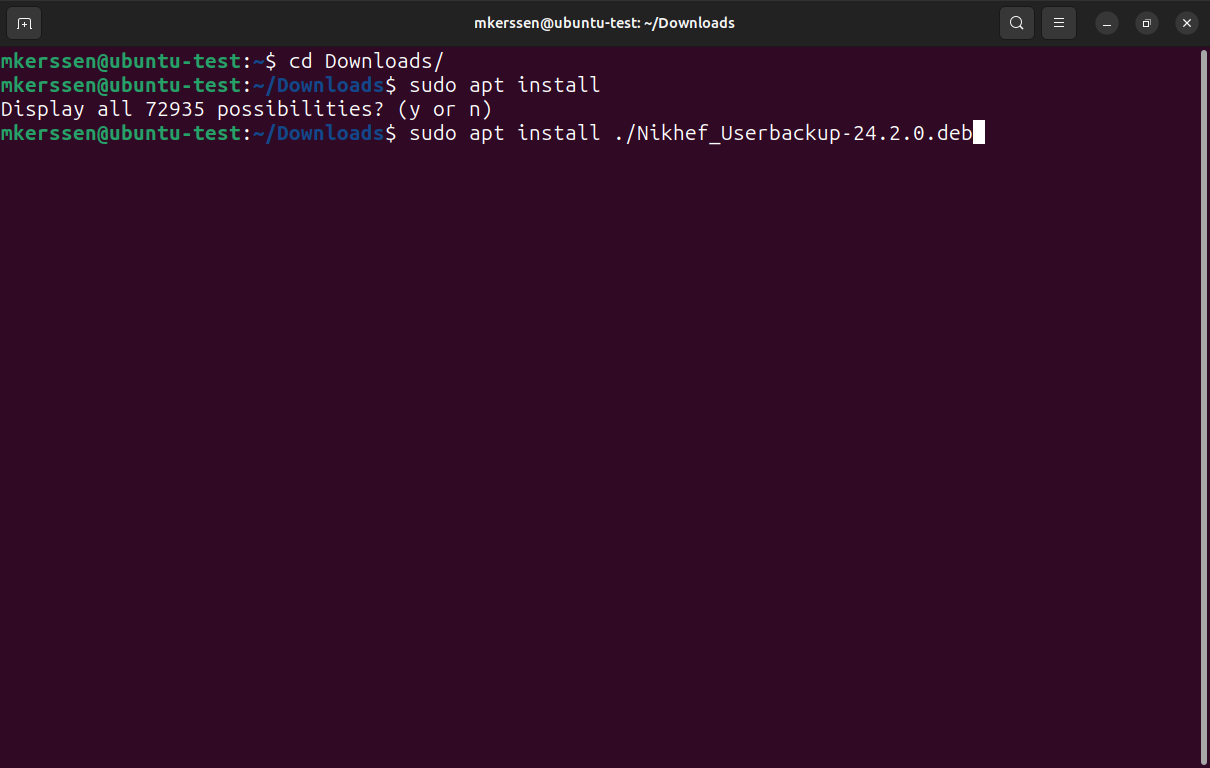 |
| Enter your COMET username here. | 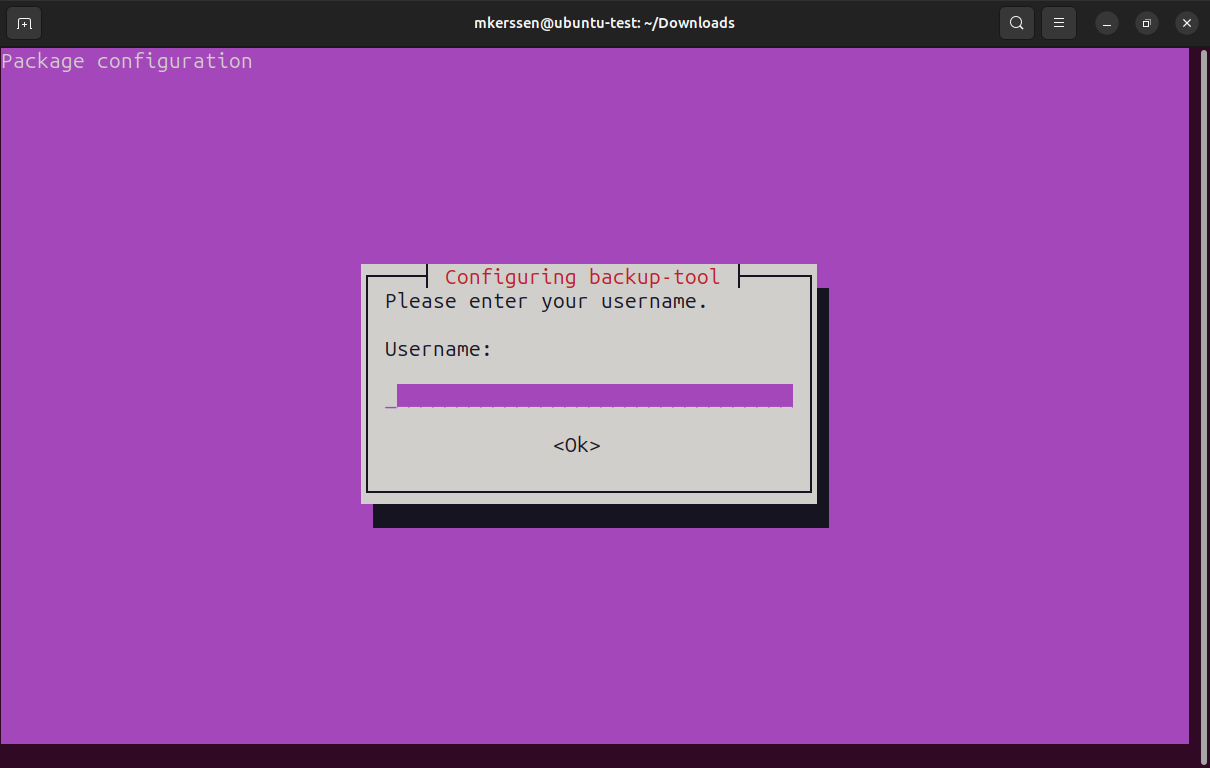 |
| Enter your COMET password here. | 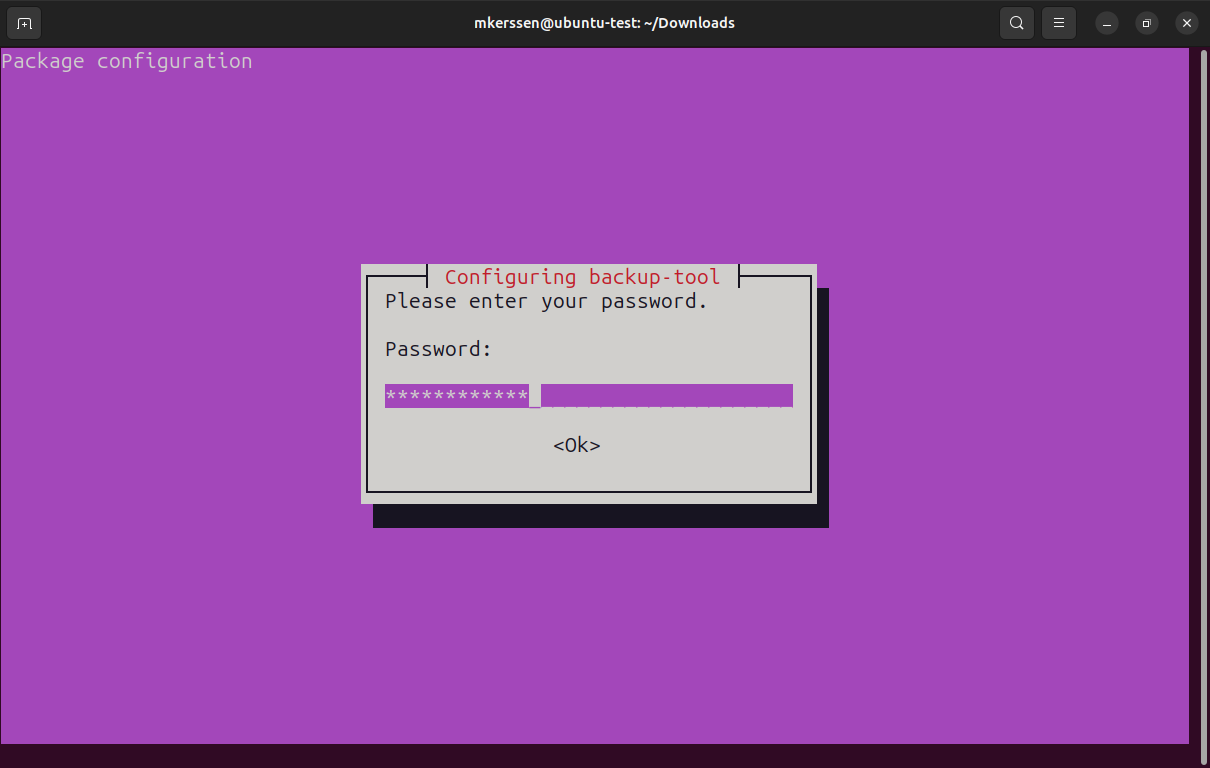 |
| Leave the Server URL and continue the installation. | 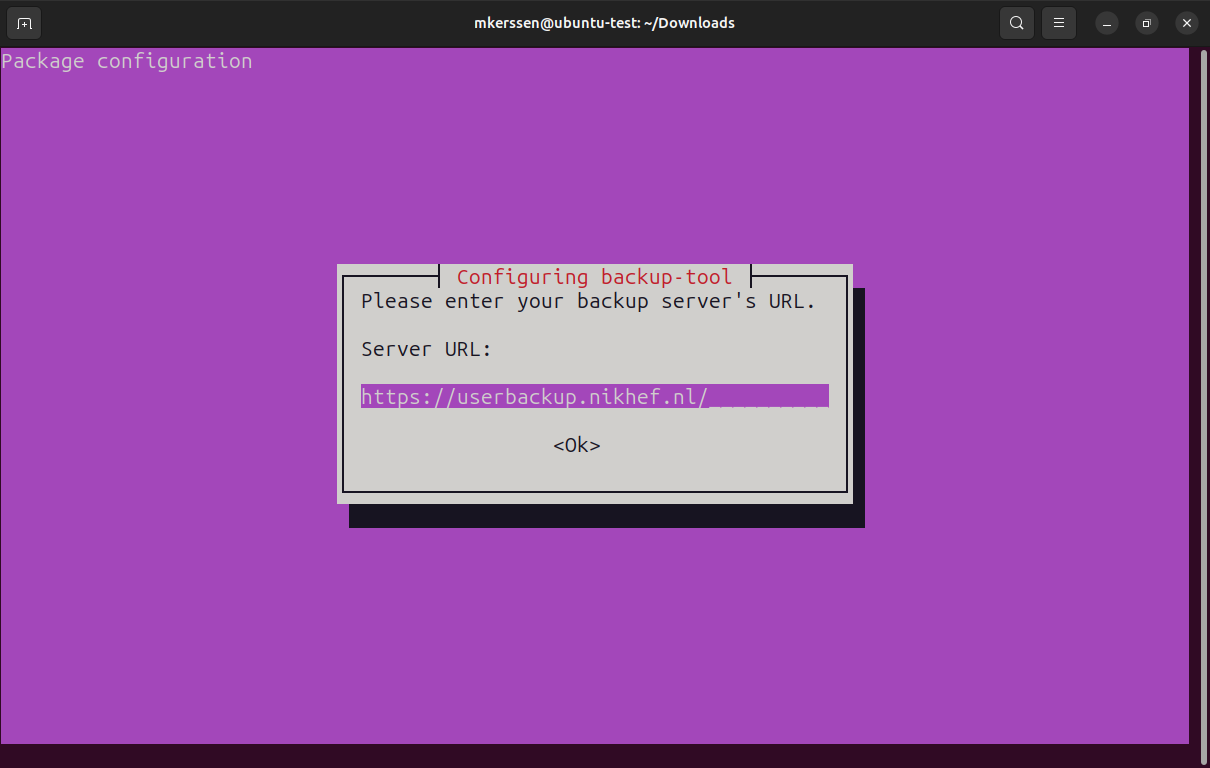 |
| The installation is now complete. Now open the COMET website again and go to 'Protected Items' on the left. Now select 'Add protected items' at the top right. |  |
| Give your backup a name that makes sense to you en press 'Next'. |  |
| Select which items you want to backup. When you're done, you can click 'Save'. | 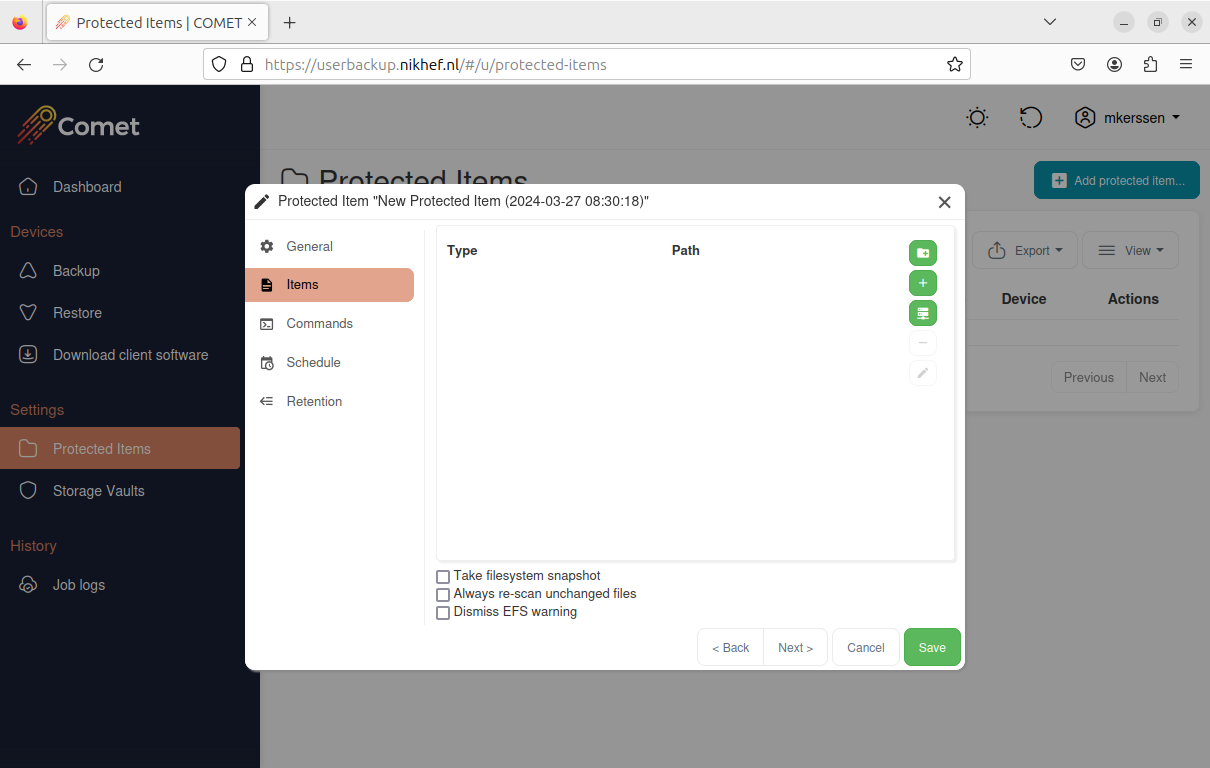 |
| Now go to 'Backup' on the left. The next screen opens. You can start the backup manually by clicking 'backup'. |  |
| On the left side under 'Job logs' you can see the status of your backups. | 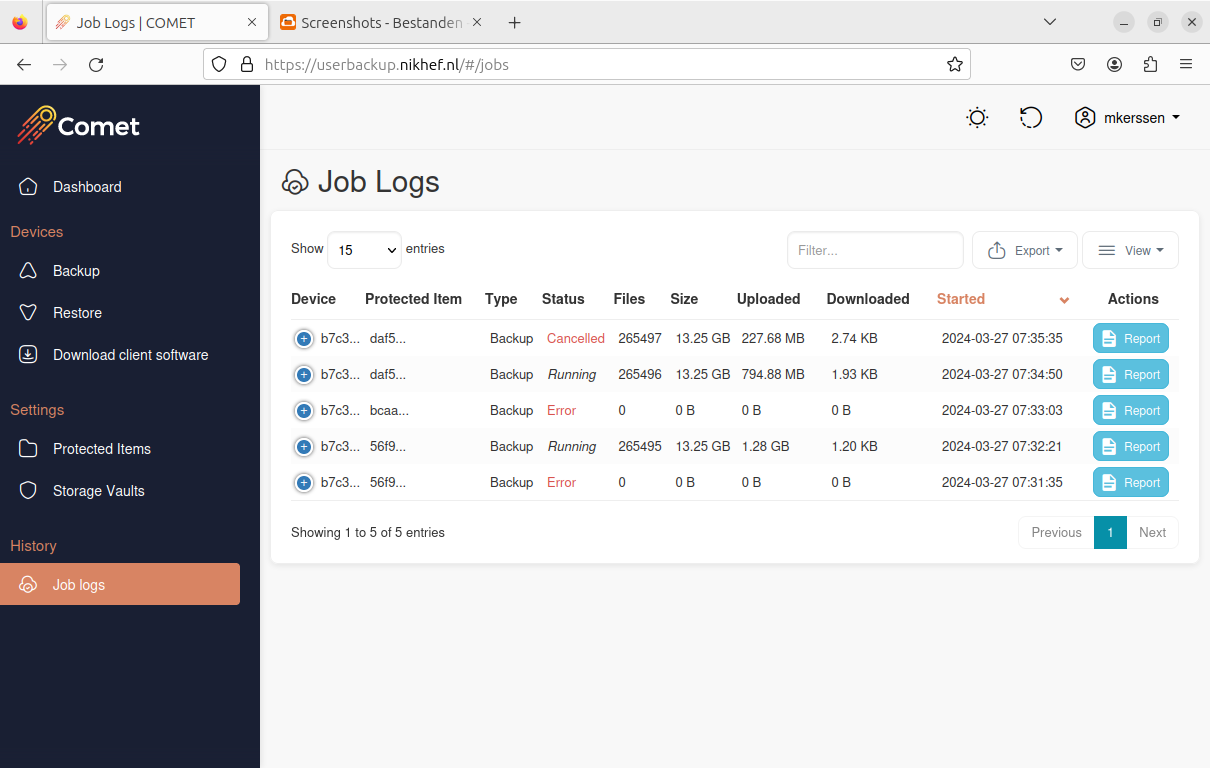 |
On Debian-based distributions, you may need to install the following package dependencies if you want to use the GUI: apt-get install libqt5gui5 libqt5svg5 |  |
If you open a terminal and navigate to the installation directory of COMET you can start the GUI by running backup-interface.x86_64 |  |
| You can manage your backup via the GUI as shown. | 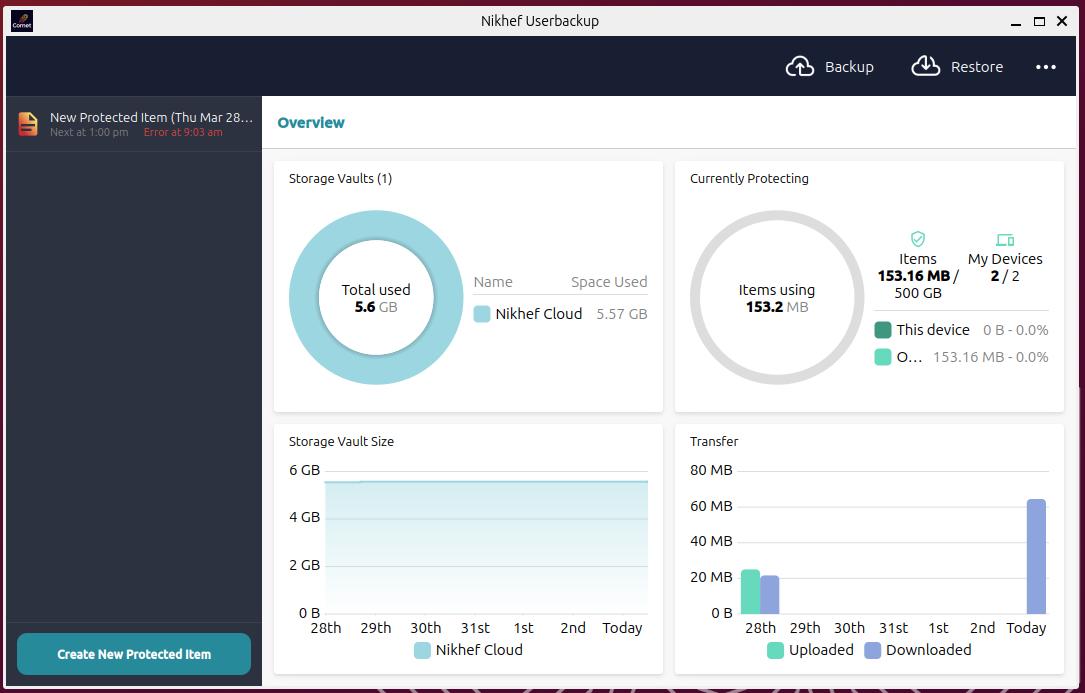 |
Below is explained how you can use COMET with Rocky (RHEL based). We use the website to manage the backup, but a GUI is also available. Here we focus on the web interface but we will also show how to start the GUI.
| Installation | Images |
|---|---|
| Go to the COMET userbackup website and log in with the username and password you received from the helpdesk. | |
| Go to 'Downloads' at the top right. | |
| Now choose to download the .tar file. | 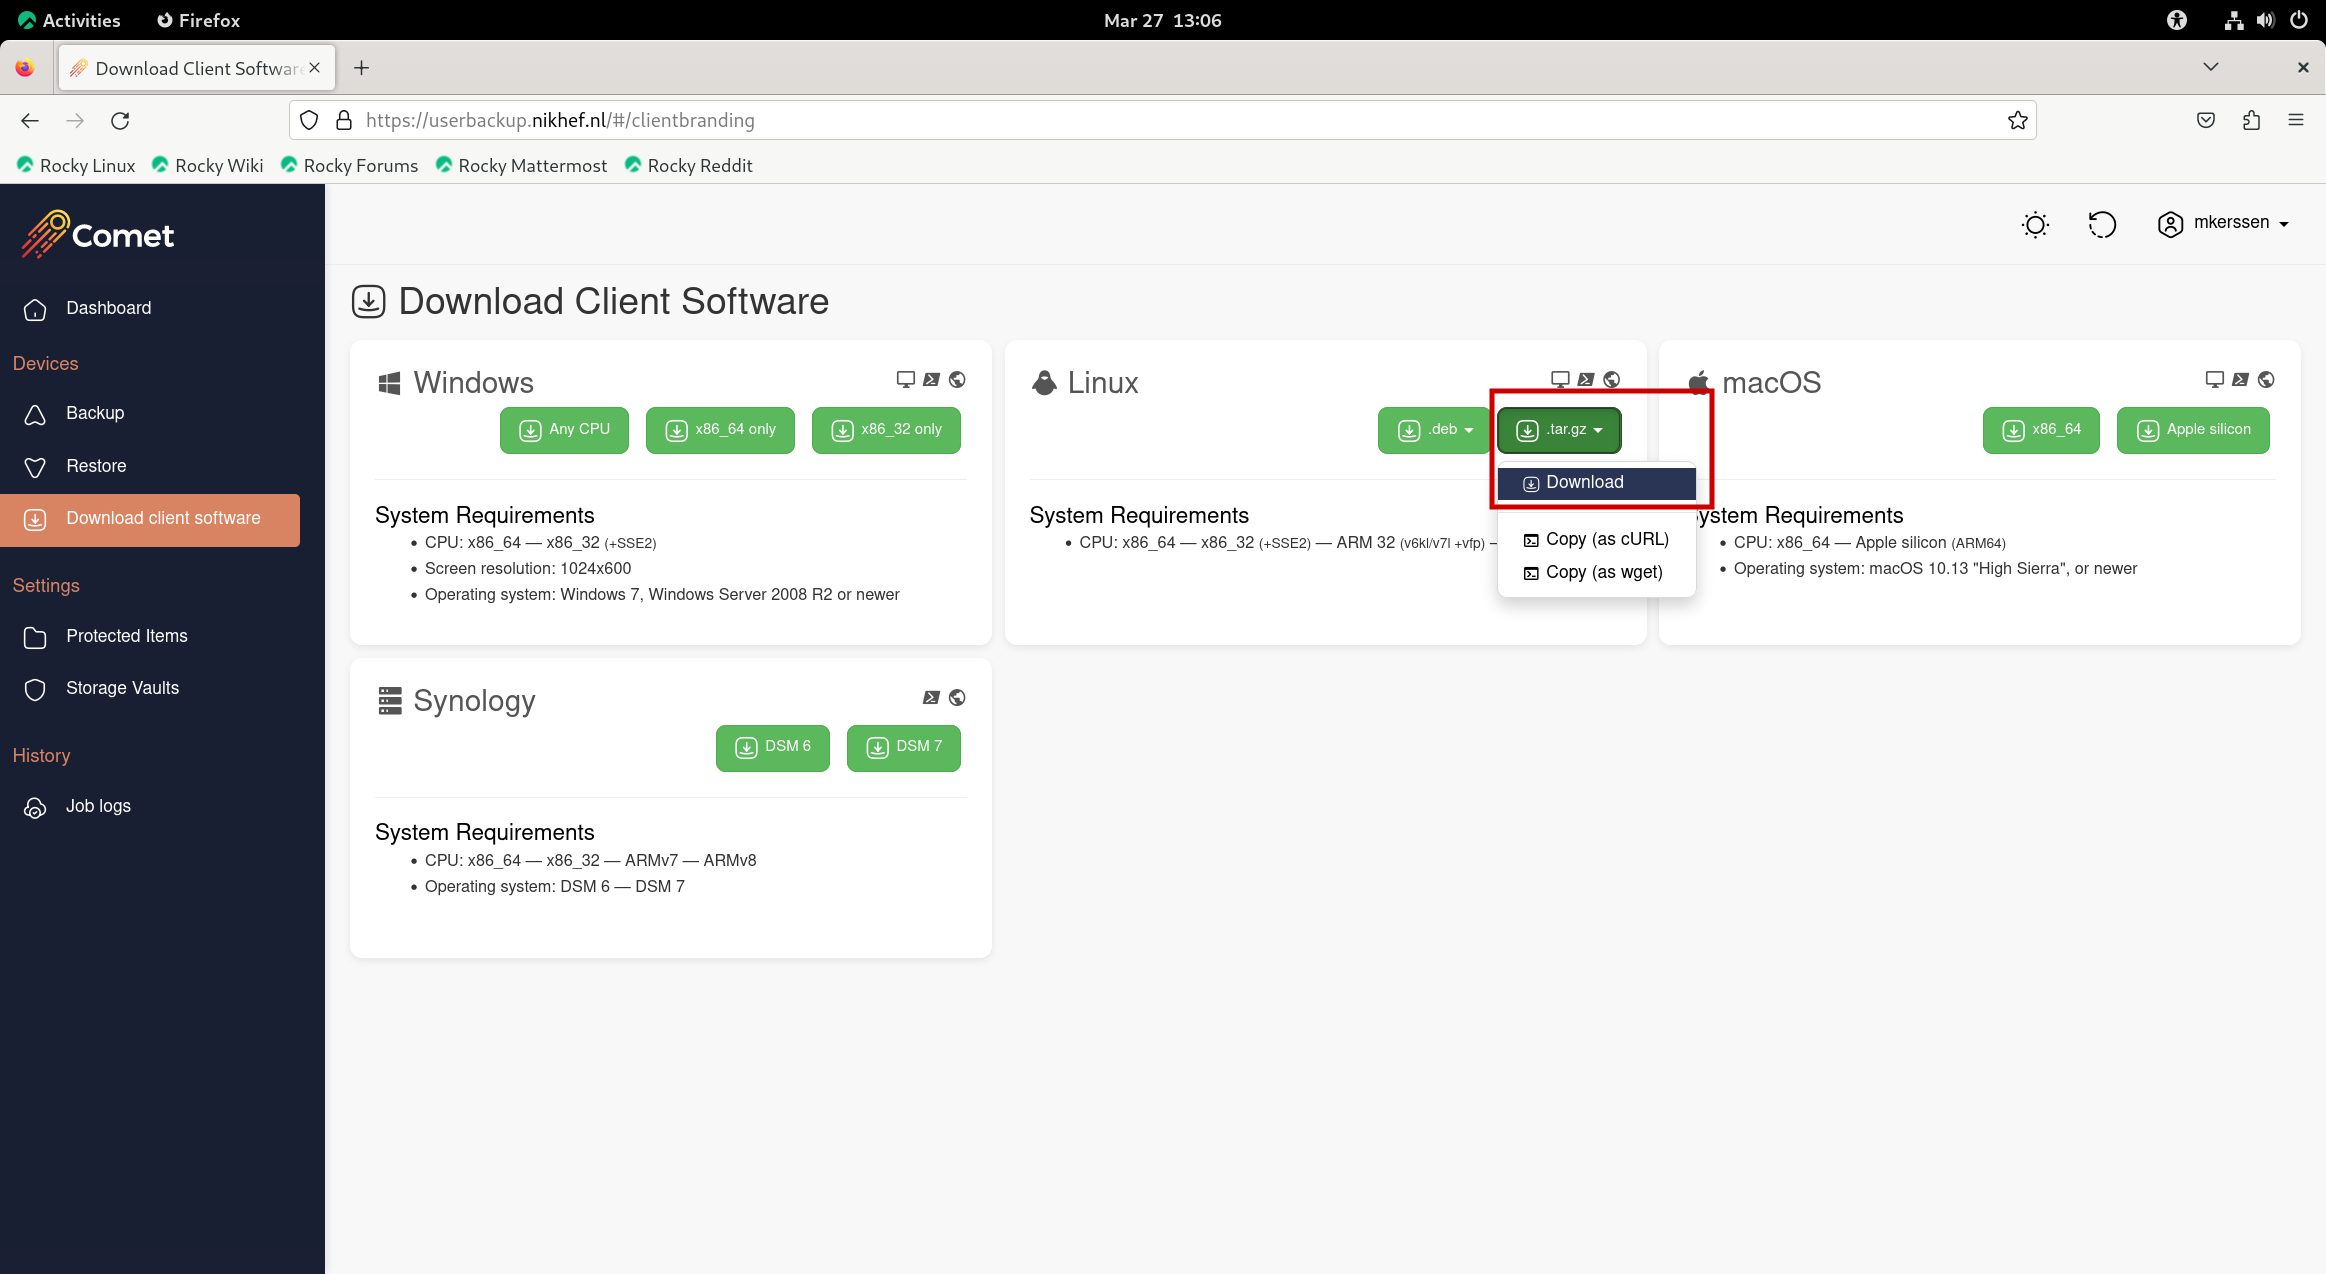 |
| Navigate to the folder where you downloaded the file. Open the properties and make the file executable. | 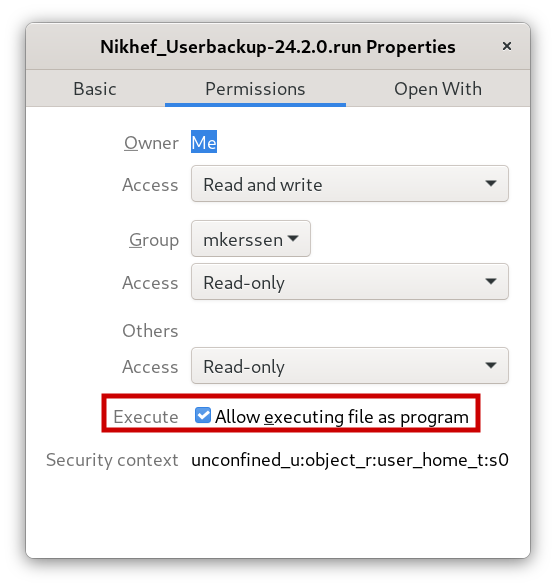 |
| Open the terminal and navigate to the folder where you downloaded the file and start the installation. Fill in the details when prompted by the installation. | 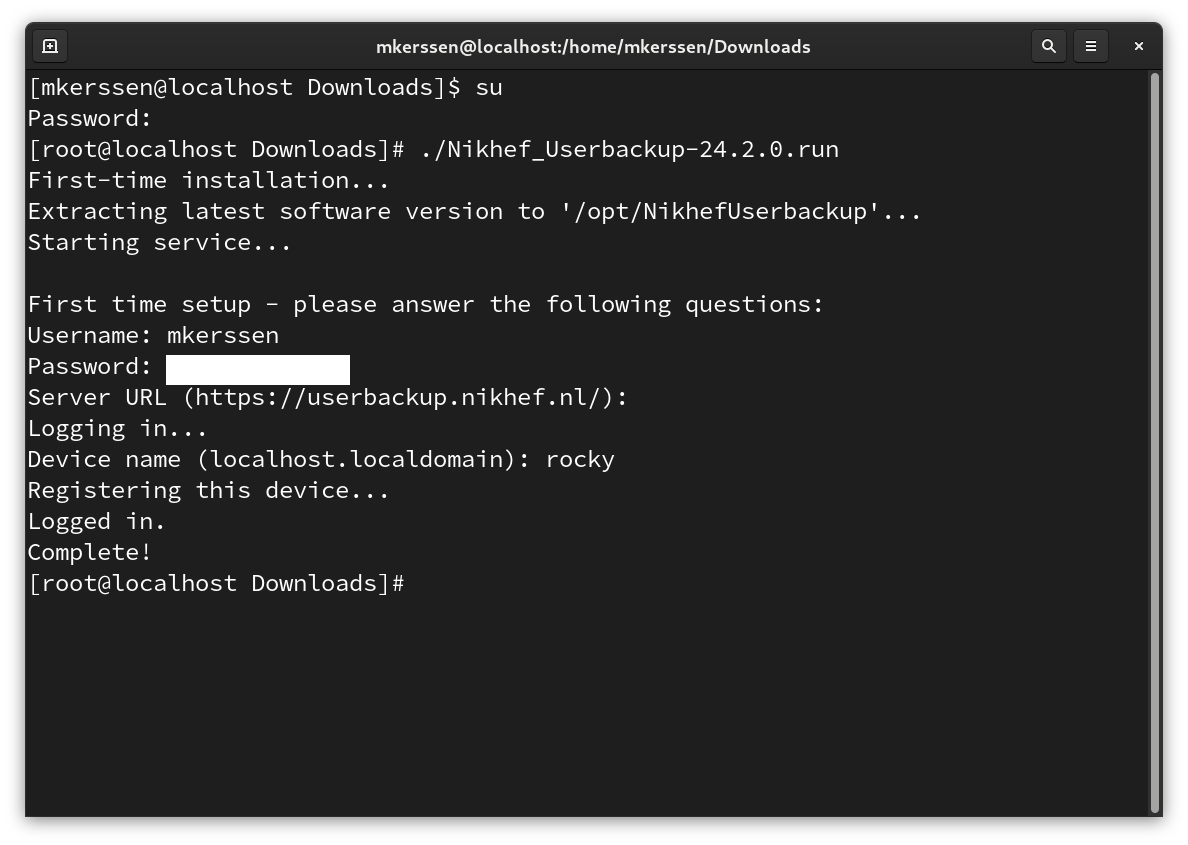 |
Edit the rc.local file in /etc/rc.d or create it if it doesn't exist. Place the following in the file and save it: #!/bin/sh -e /opt/NikhefUserbackup/backup-daemon-start.sh & exit 0 Now save the file and make it executable: chmod +x rc.local After that reboot the system. | 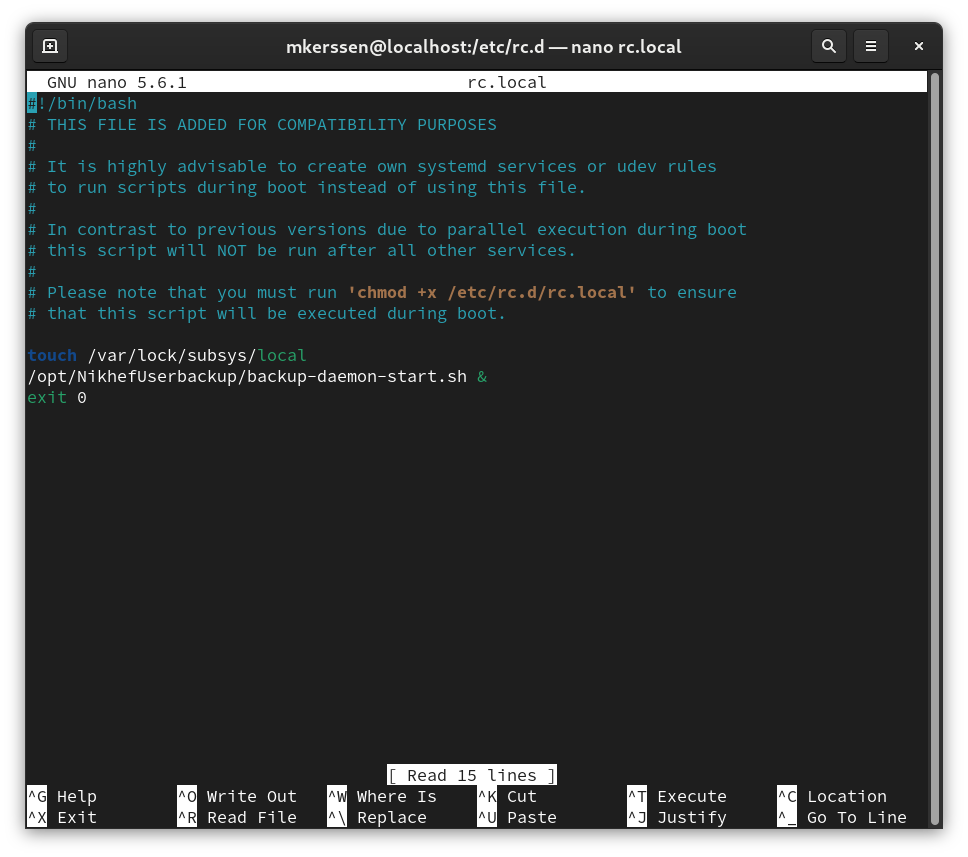 |
After logging in, check whether the backup tool service has started automatically with:systemctl status rc-local.service | 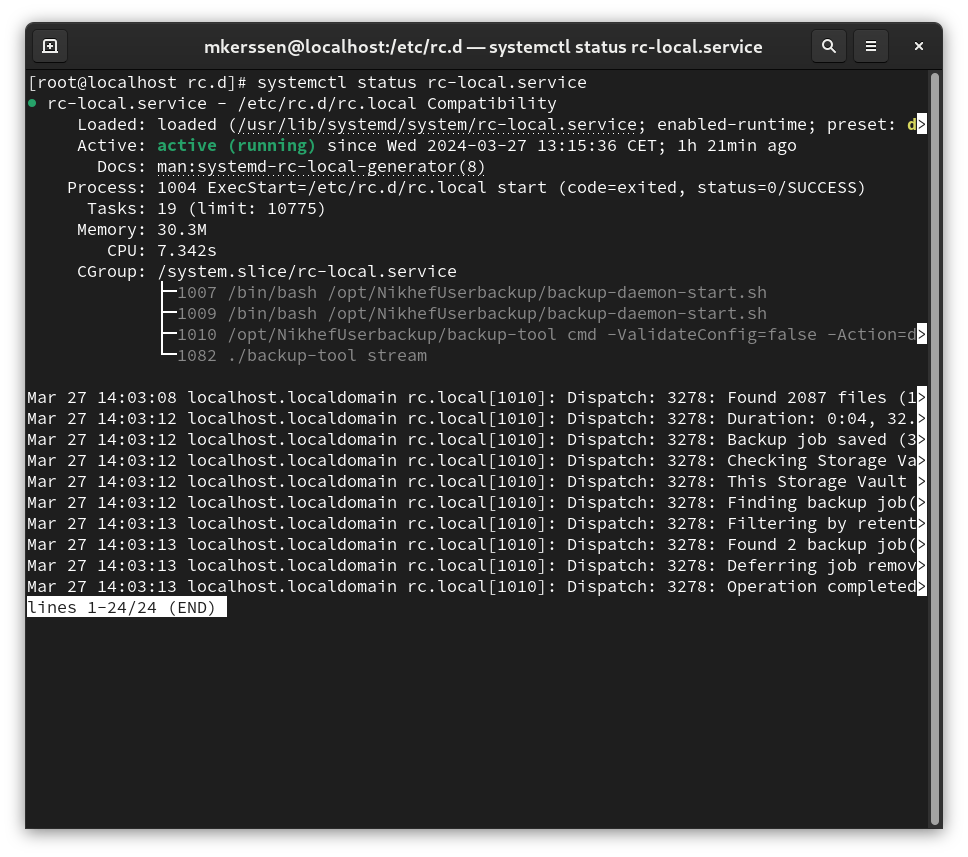 |
| The installation is now complete. Now open the COMET website again and go to 'Protected Items' on the left. Now select 'Add protected items' at the top right. | |
| Give your backup a name that makes sense to you en press 'Next'. | |
| Select which items you want to backup. When you're done, you can click 'Save'. | |
| Now go to 'Backup' on the left. The next screen opens. You can start the backup manually by clicking 'backup'. | 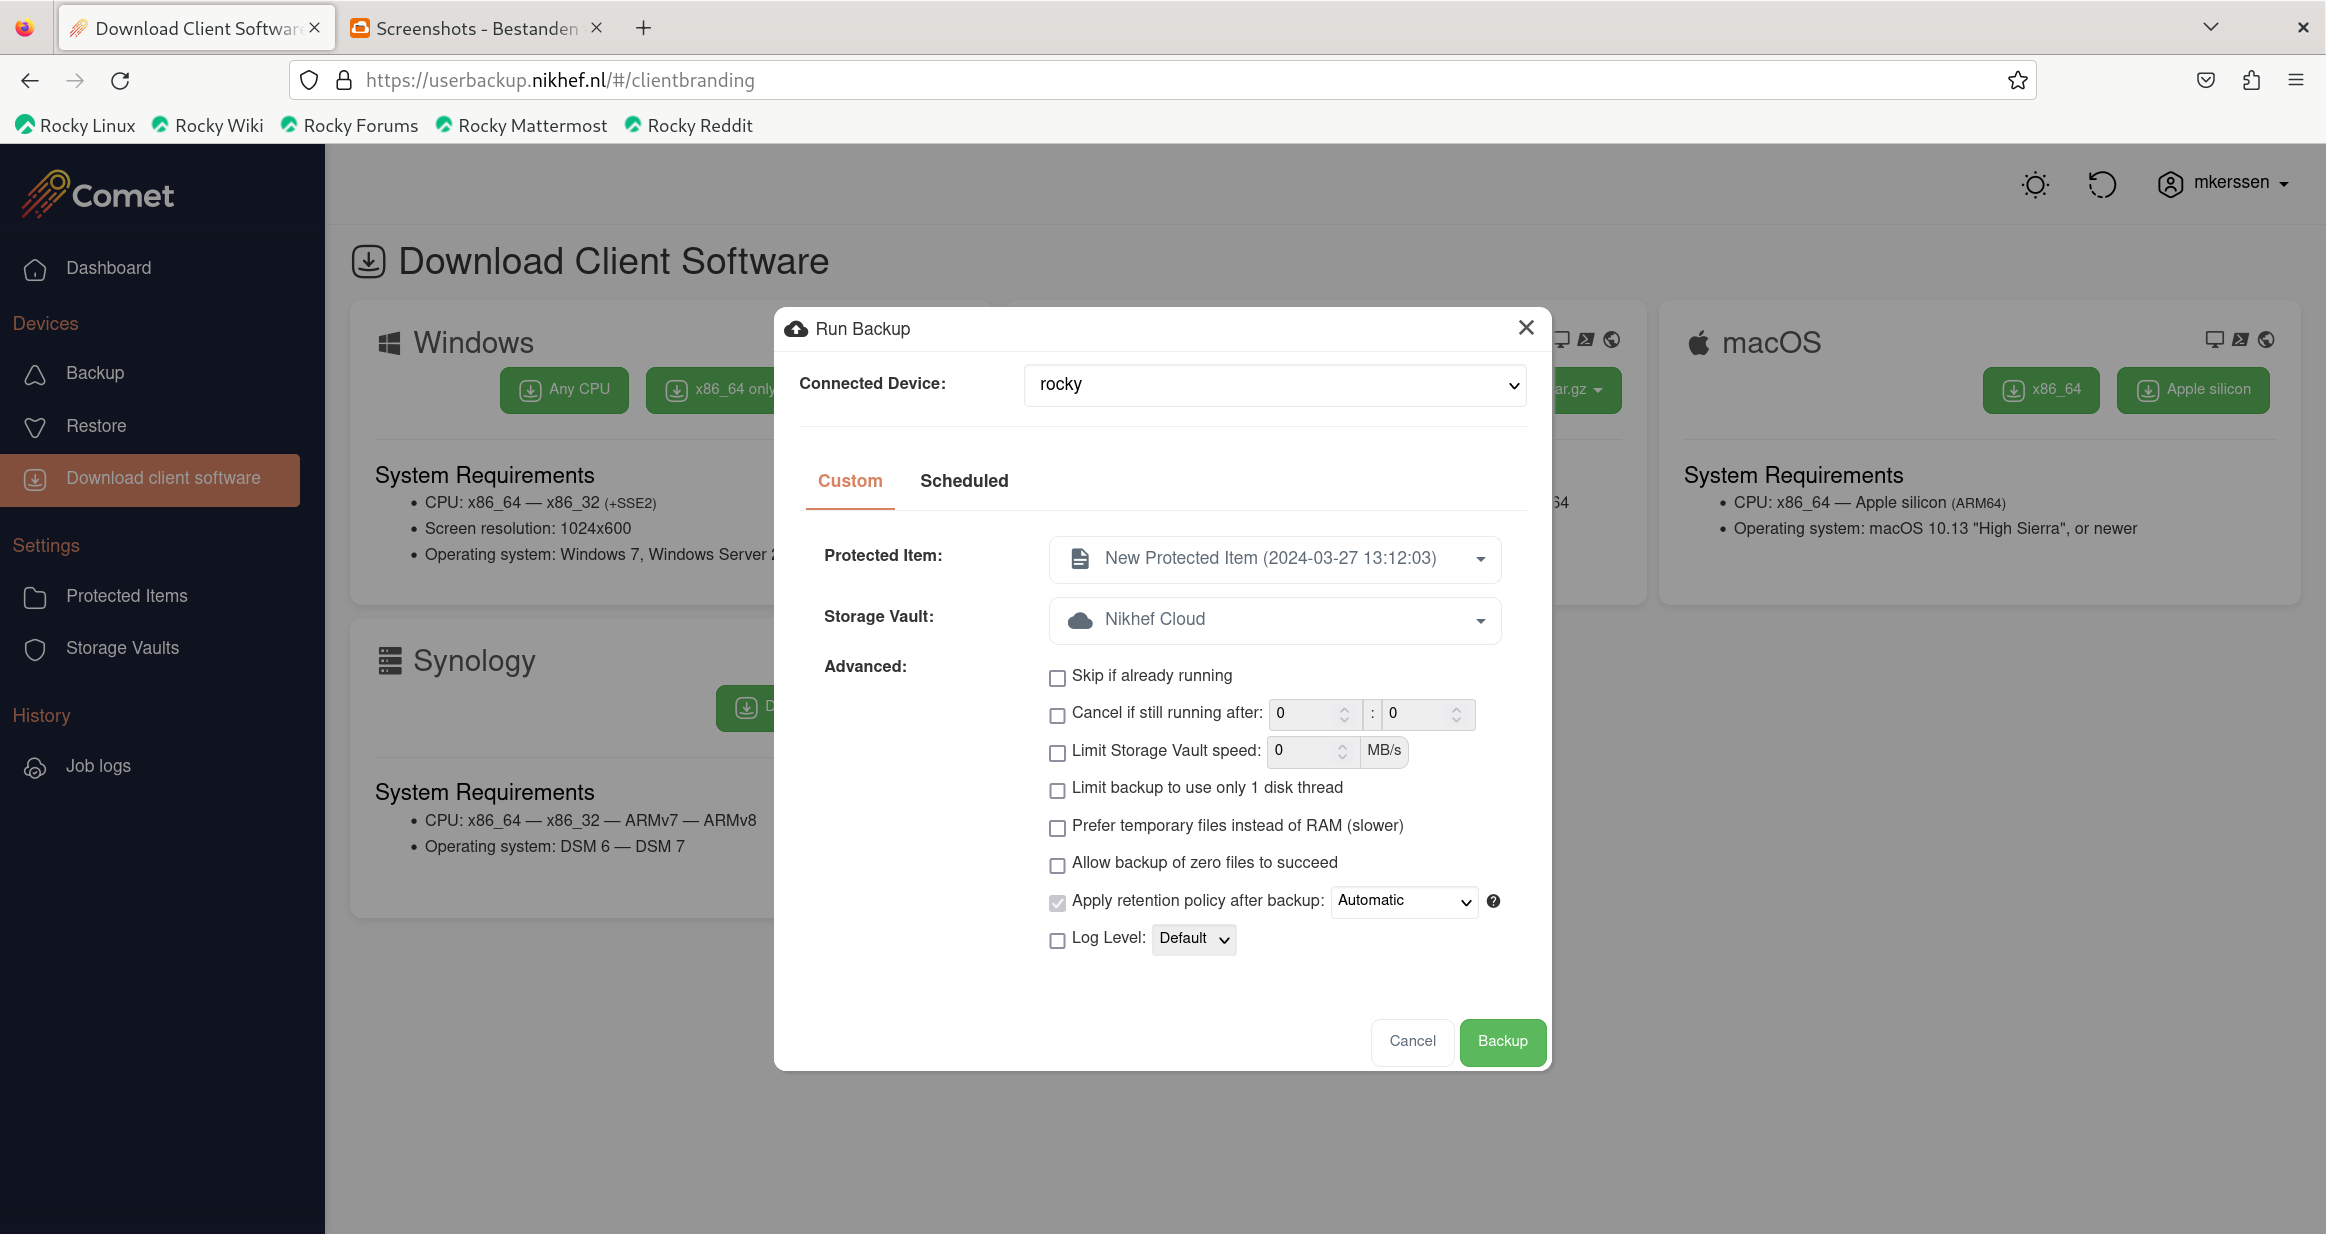 |
On RHEL-based distributions, you may need to install the following package dependencies if you want to use the GUI: yum install qt5-qtbase.x86_64 qt5-qtsvg.x86_64 |  |
If you open a terminal and navigate to the installation directory of COMET you can start the GUI by running backup-interface.x86_64 |  |
| You can manage your backup via the GUI as shown. | 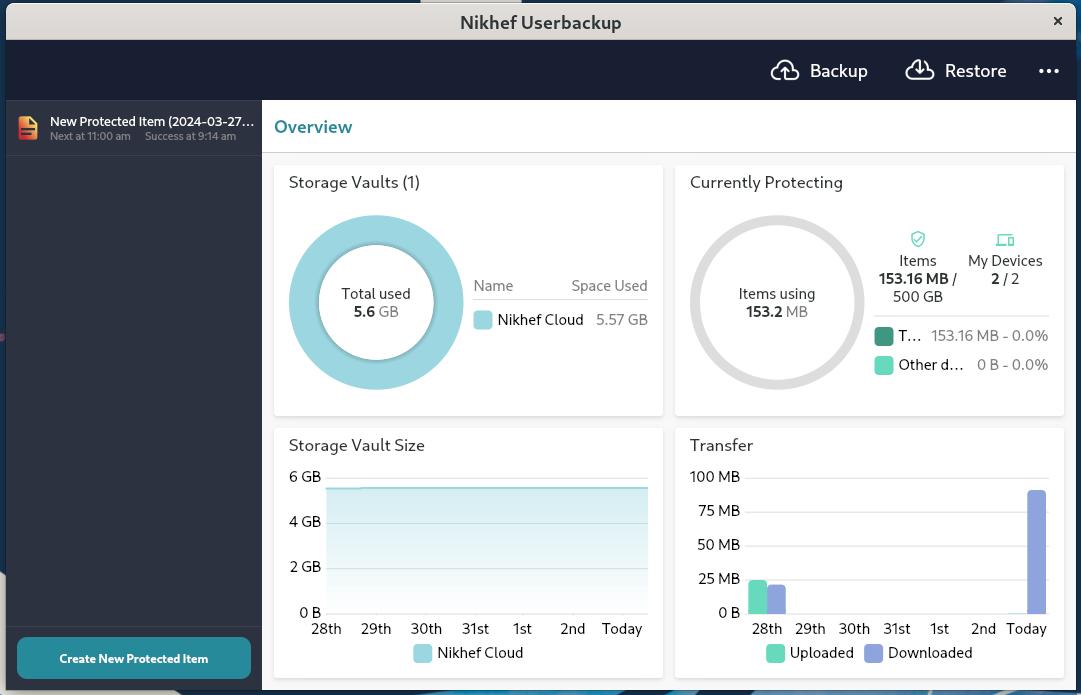 |
Links
https://docs.cometbackup.com/latest/installation/comet-backup-usage
https://docs.cometbackup.com/latest/start-here/log-in
https://support.apple.com/en-us/102527
https://support.apple.com/guide/mac-help/allow-accessibility-apps-to-access-your-mac-mh43185/mac