Printing
Aim: Provide instructions to setup and use the multi-functional printers for printing, scanning and copying.
Where: Any printer at Nikhef.
Summary
Nikhef has a roaming printing system ("Follow-Me") so you can print from anywhere on the network, and retrieve your job at any printer. You need to do the following things once:
- Linking your drop to the printer using your Nikhef username and passphrase
- Install printer drivers on your PC or laptop and setting up the network printers
Registering your access key with the print system
Before you are able to use your access tag or iLoc key, you have to activate it once for the print system. Put your access tag or key on the reader sticker on the left side of the printer's touch panel, and enter your Nikhef username and password.
Keep in mind that after presenting your drop, you have a limited amount of time to enter your credentials before the session times out and you will need to try again. If entering your password using the touchscreen takes too long, you can connect a physical USB keyboard to the printer. A free USB port is available next to the printer’s display where a keyboard can be plugged in.
Installation
Follow the instructions for your operating system to print directly from your PC or laptop.
To access the print portal, you must be connected to EduRoam or NIKHEF using your Nikhef account. Instructions on how to connect can be found here.
You do not need this step if you print via e-mail, or from a USB storage device.
(this will not differ wildly from older KDE Plasma versions)
Signing into the print portal
18 March 2026 - Password notice
A known issue may prevent sign-in if your password contains certain special characters. Toshiba is aware of this issue and has not yet provided a fix. As a workaround, reset your password: https://sso.nikhef.nl/passwd/
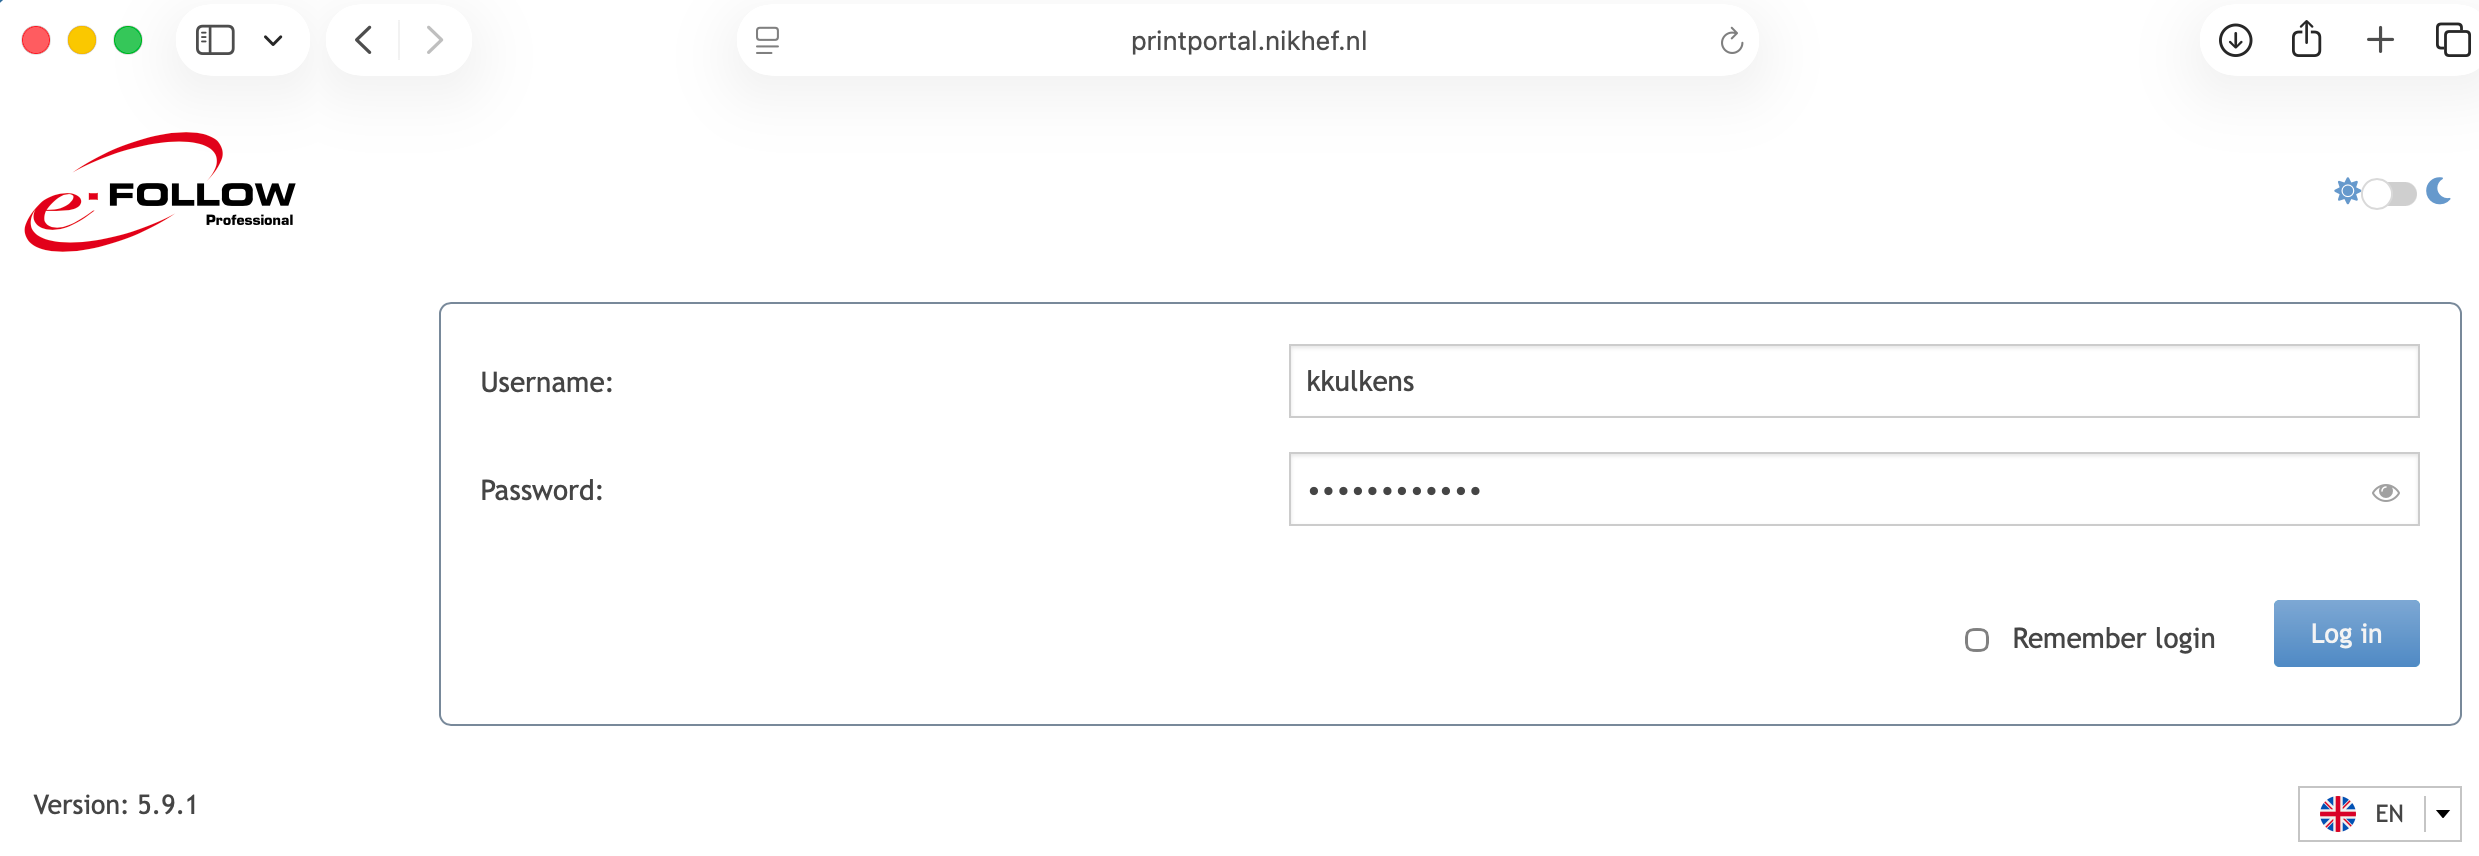
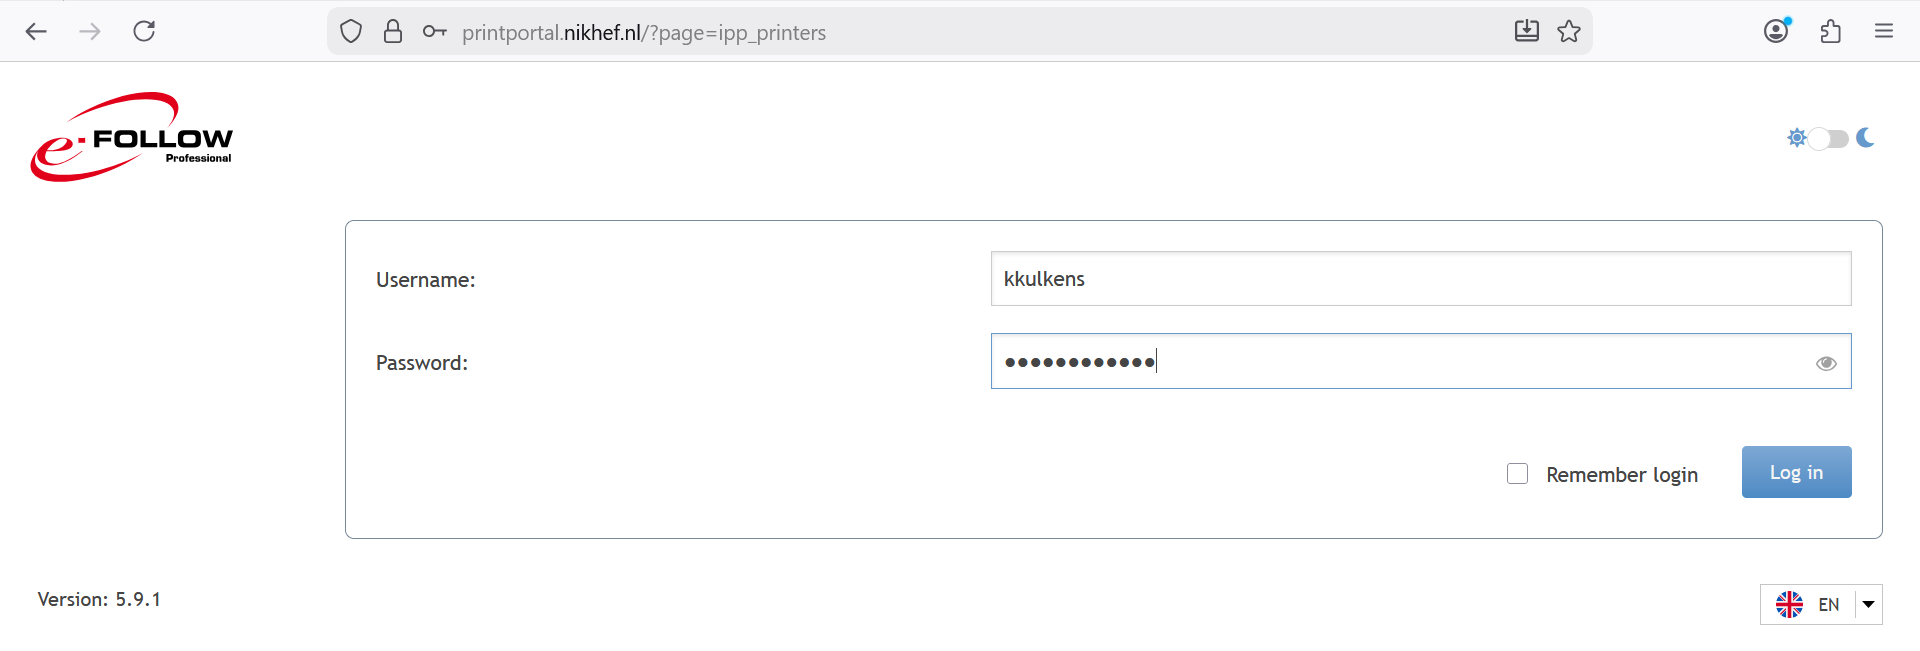
Go to https://printportal.nikhef.nl/ and sign in using your Nikhef username and password.
Note: Your username should not include @nikhef.nl (for example: jdoe).
Add a printer queue
-
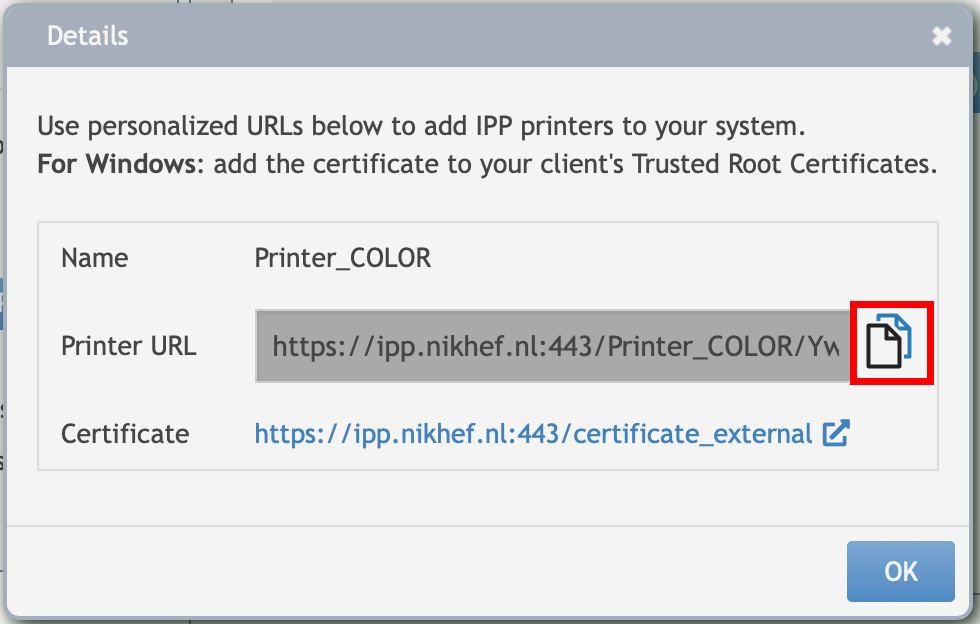
Click Show details next to the Printer_BW (or Printer_COLOR) setup.

-
Click the highlighted button to copy the Printer URL.
-
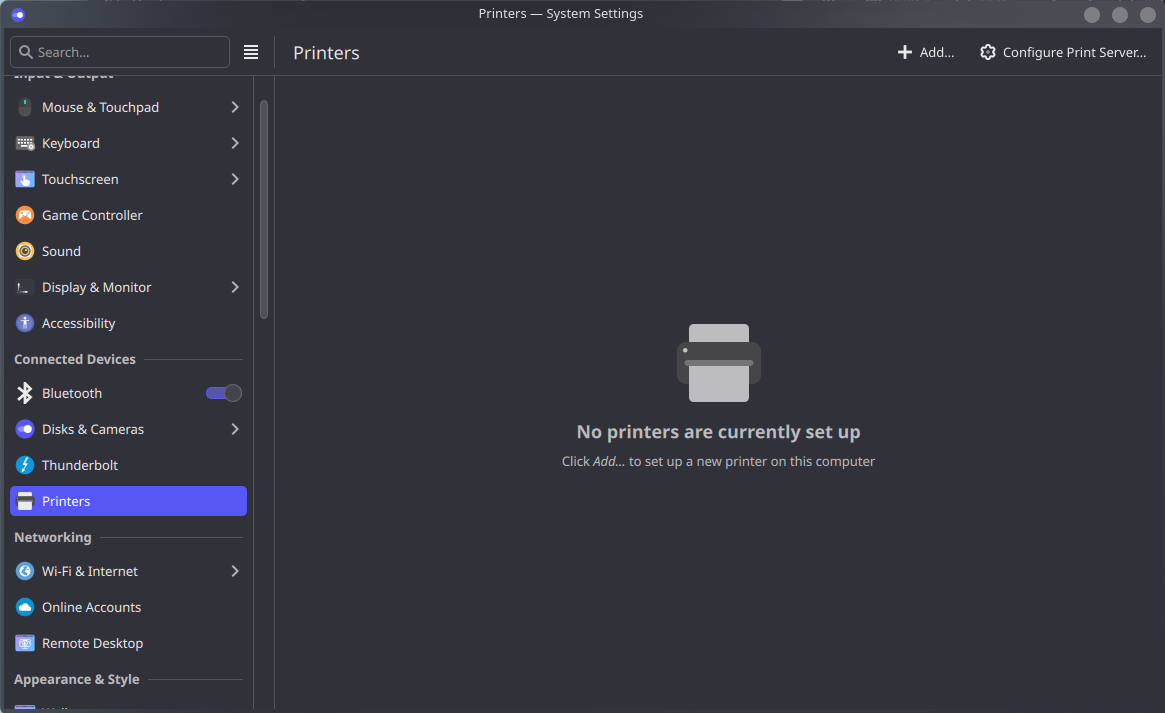
Go to system settings, search for printers, and click on Add
-
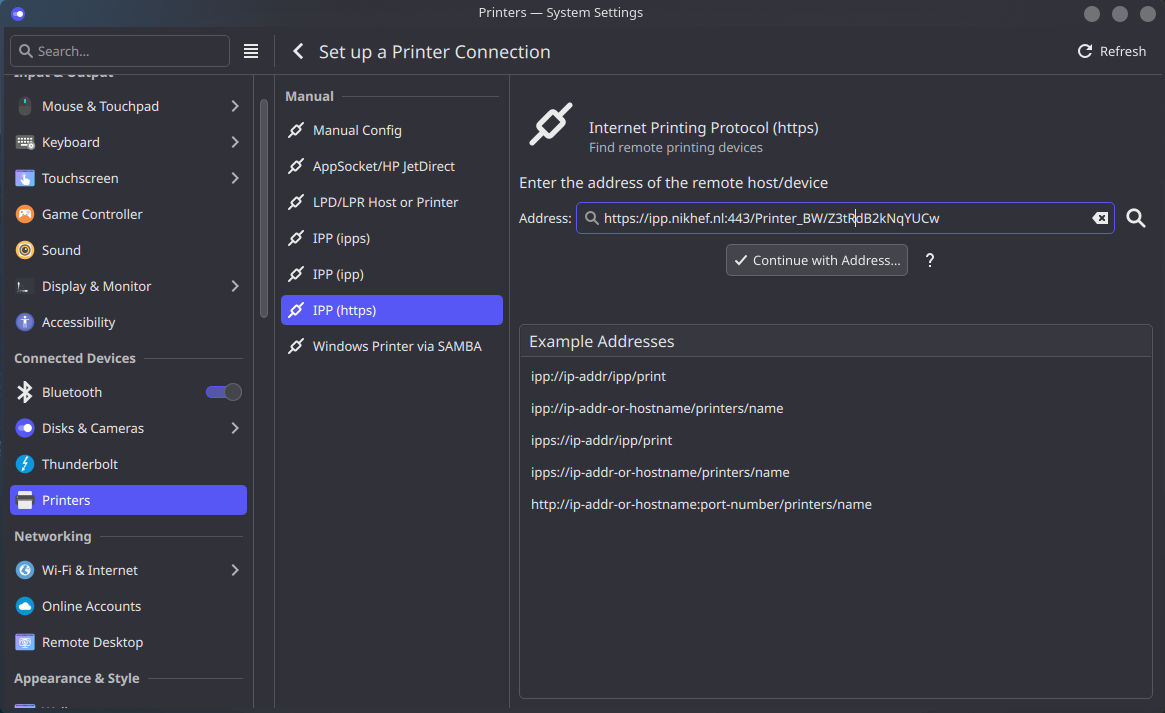
Select 'IPP (https)' and paste the URL from the printportal.nikhef.nl in the Enter the address field.
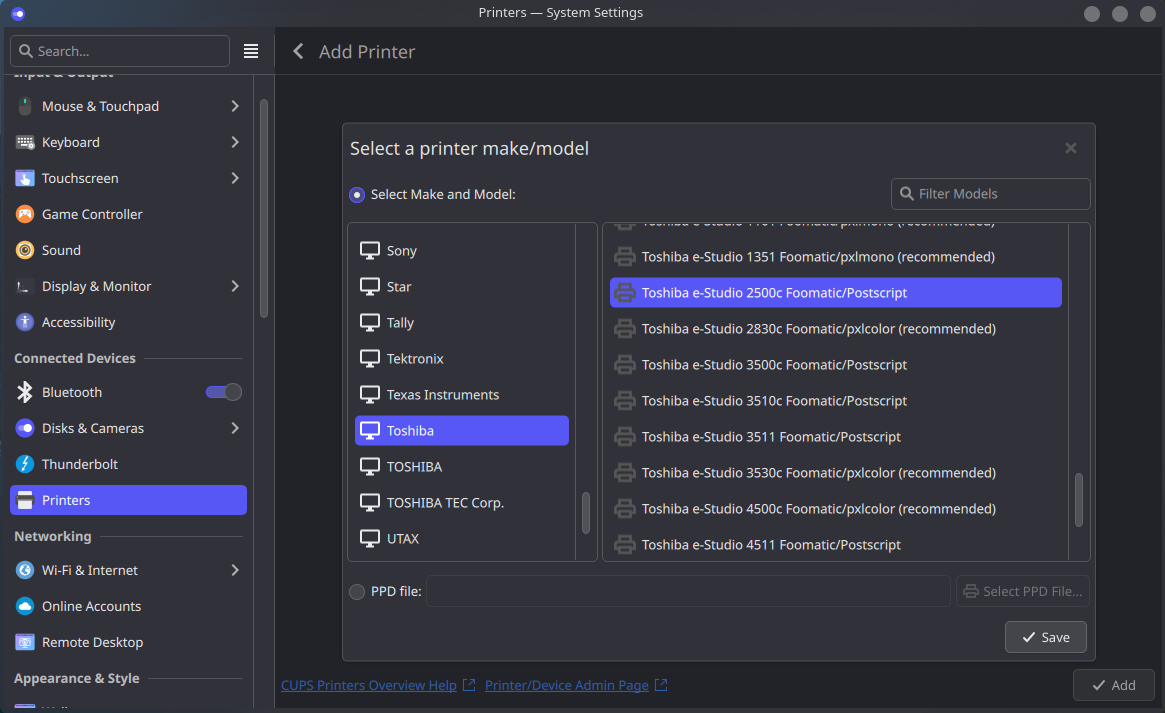
If, for some reason, your Linux install does not have the driver installed of the Toshiba printer model (2500c/2525c) that we're using at Nikhef, then please consider downloading the PPD file from https://www.openprinting.org/printer/Toshiba/Toshiba-e-Studio_2500c and use this PPD file instead of looking for the make and model after entering the URL of the printer.
-
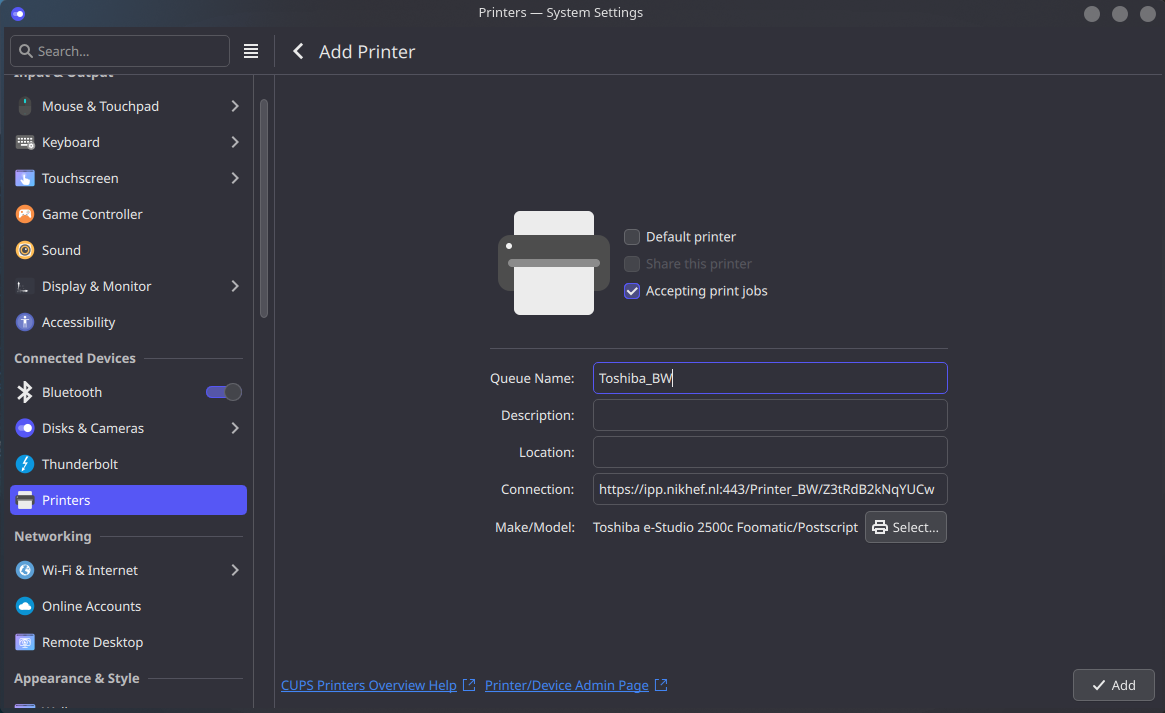
Search for the first mention of Toshiba in the Vendor list and in here select the 'Toshiba e-Studio 2500c' line and click Save
-
Give the printer a name, for example 'Toshiba_BW' for Black&White or 'Toshiba_COLOR' for color prints.
-
Done!
Signing into the print portal
18 March 2026 - Password notice
A known issue may prevent sign-in if your password contains certain special characters. Toshiba is aware of this issue and has not yet provided a fix. As a workaround, reset your password: https://sso.nikhef.nl/passwd/
Go to https://printportal.nikhef.nl/ and sign in using your Nikhef username and password.
Note: Your username should not include @nikhef.nl (for example: jdoe).
Add a printer queue
-
Click Show details next to the Printer_BW (or Printer_COLOR) setup.
-
Click the highlighted button to copy the Printer URL.
-
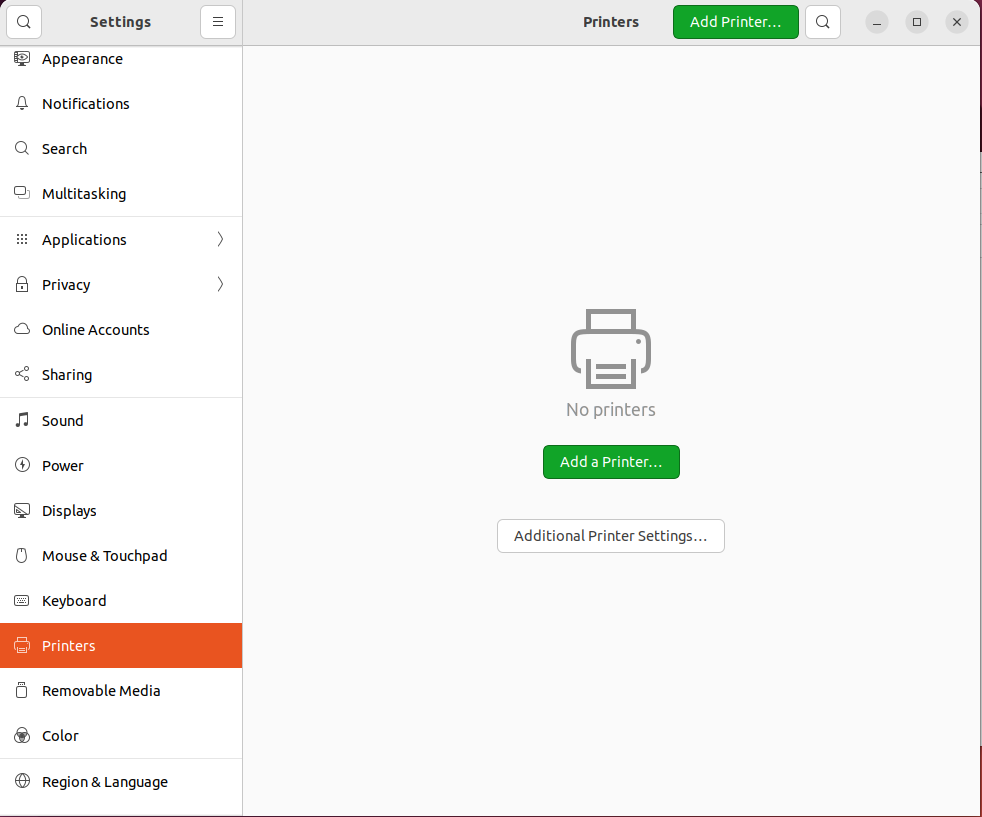
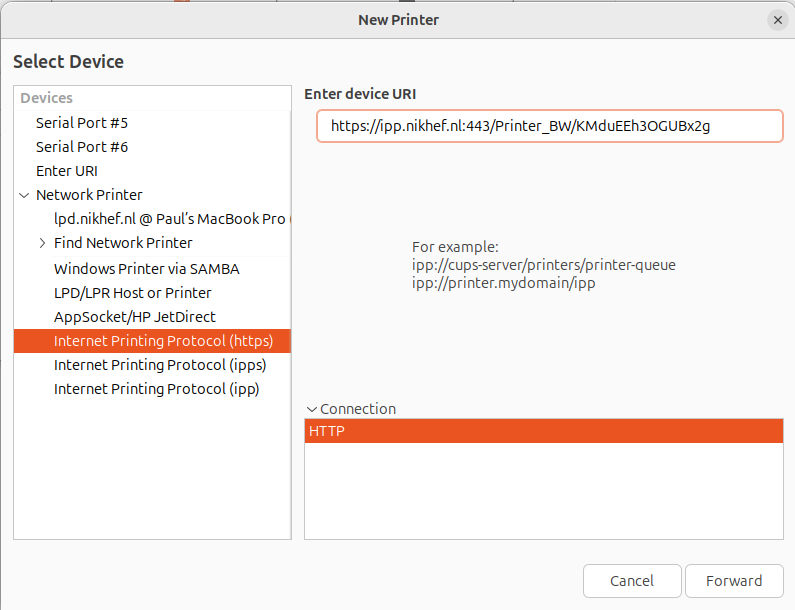
Go to system settings, search for printers, and click on 'Additional Printer Settings'.
-
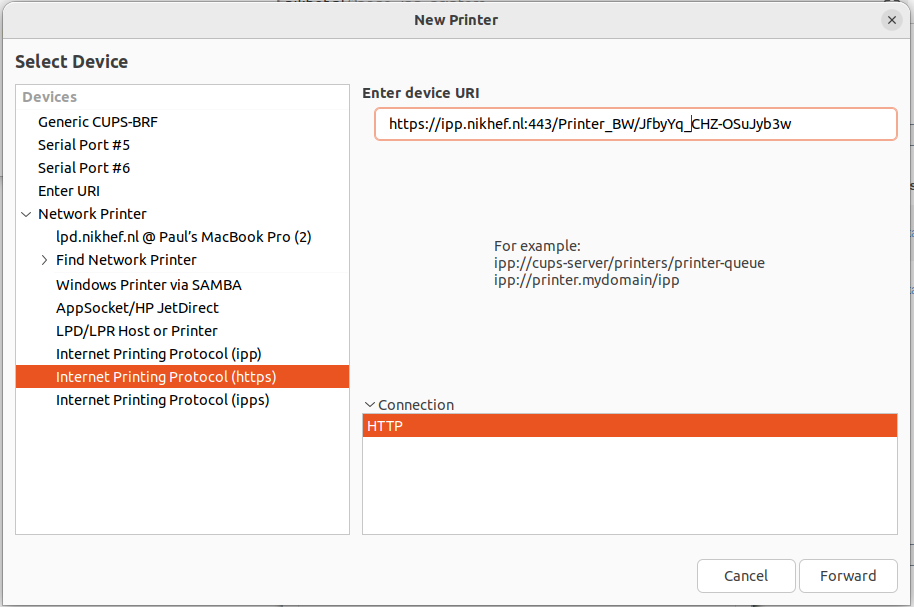
Select 'Internet printing protocol (https)' and paste the URL from the printportal.nikhef.nl in the Enter device URI.
-
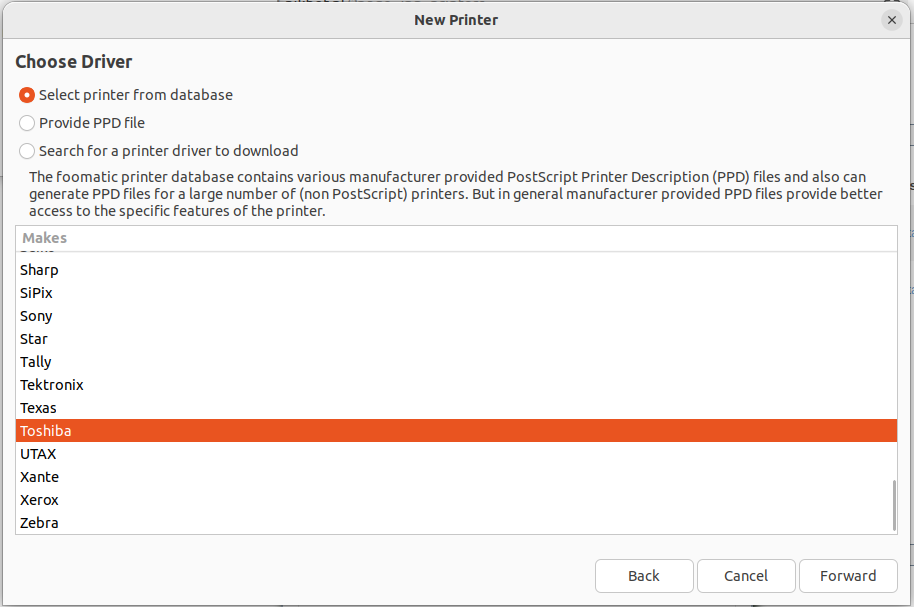
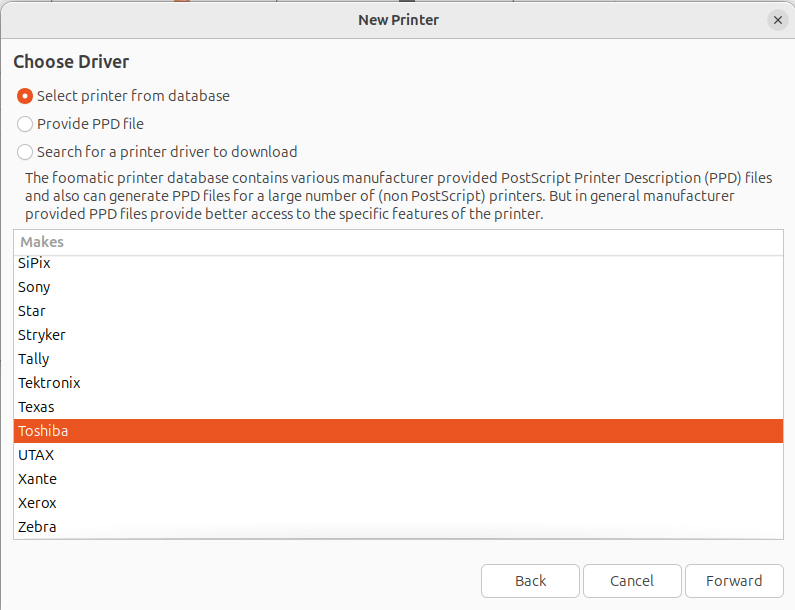
Search for Toshiba in the Vendor list and click Forward.
If, for some reason, your Linux install does not have the driver installed of the Toshiba printer model (2500c/2525c) that we're using at Nikhef, then please consider downloading the PPD file from https://www.openprinting.org/printer/Toshiba/Toshiba-e-Studio_2500c and use this PPD file instead of looking for the make and model after entering the URL of the printer.
-
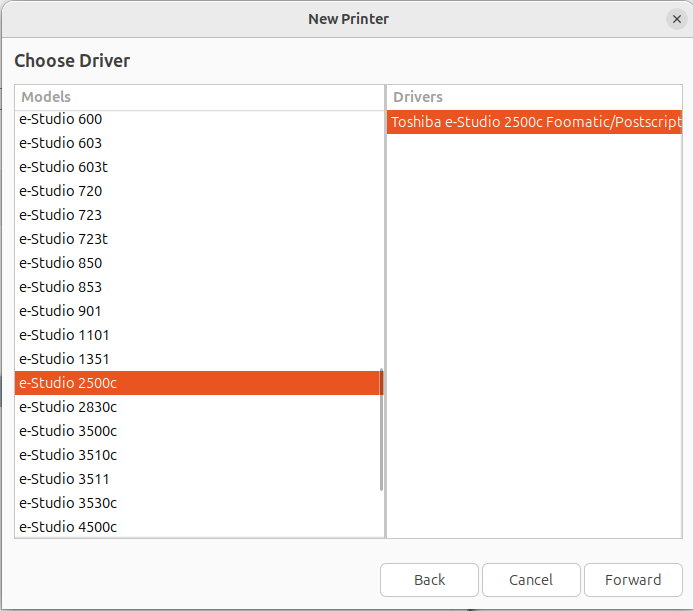
Select the model 'e-Studio 2500c' and click Forward.
-
Give the printer a name, for example 'Toshiba_BW' for Black&White or 'Toshiba_COLOR' for color prints.
-
Done!
Signing into the print portal
18 March 2026 - Password notice
A known issue may prevent sign-in if your password contains certain special characters. Toshiba is aware of this issue and has not yet provided a fix. As a workaround, reset your password: https://sso.nikhef.nl/passwd/
Go to https://printportal.nikhef.nl/ and sign in using your Nikhef username and password.
Note: Your username should not include @nikhef.nl (for example: jdoe).
Add a printer queue
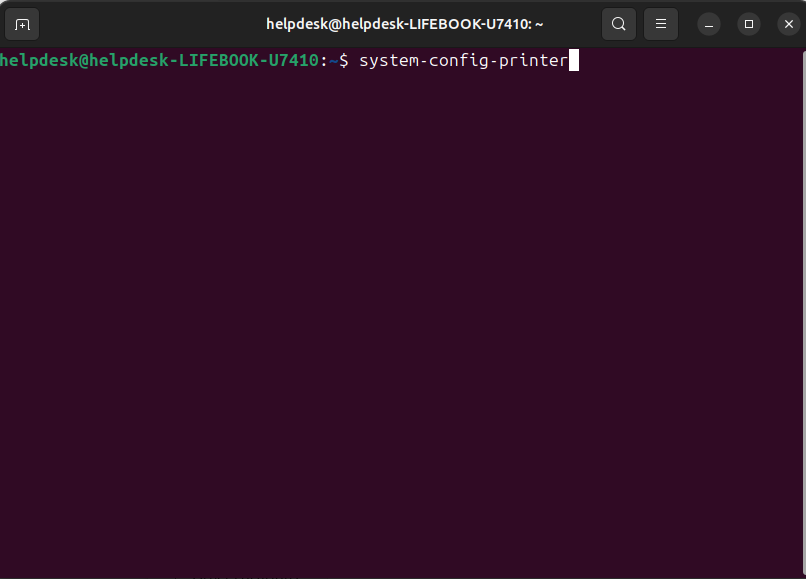
This differs somewhat from Gnome 42 in the way that the most obvious route (via system settings -> printers) does not give you the option to add a network printer. For this you need the utility: "system-config-printer" which should be installed on most systems. If not, install it with 'sudo apt install system-config-printer'.
-
Execute the 'system-config-printer' utility by running it from the terminal.
-
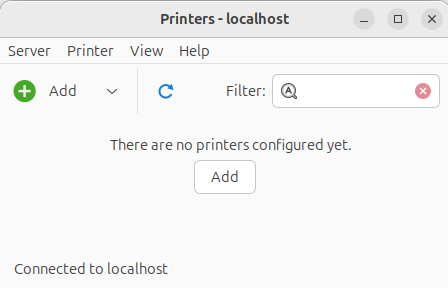
Click the Add button.
-
Select 'Internet printing protocol (https)' and paste the URL from the printportal.nikhef.nl in the Enter device URI.
-
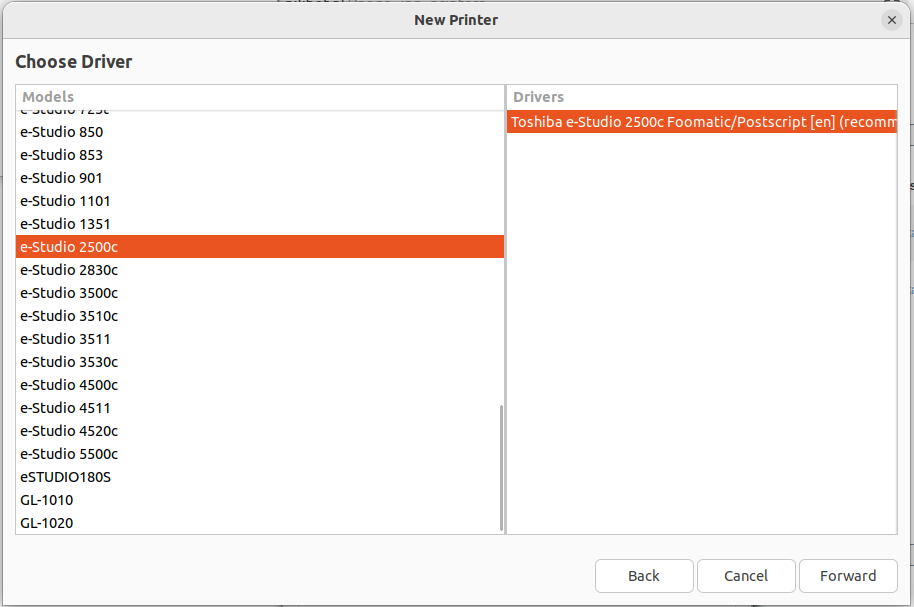
Search for Toshiba in the Vendor list and click Forward.
If, for some reason, your Linux install does not have the driver installed of the Toshiba printer model (2500c/2525c) that we're using at Nikhef, then please consider downloading the PPD file from https://www.openprinting.org/printer/Toshiba/Toshiba-e-Studio_2500c and use this PPD file instead of looking for the make and model after entering the URL of the printer.
-
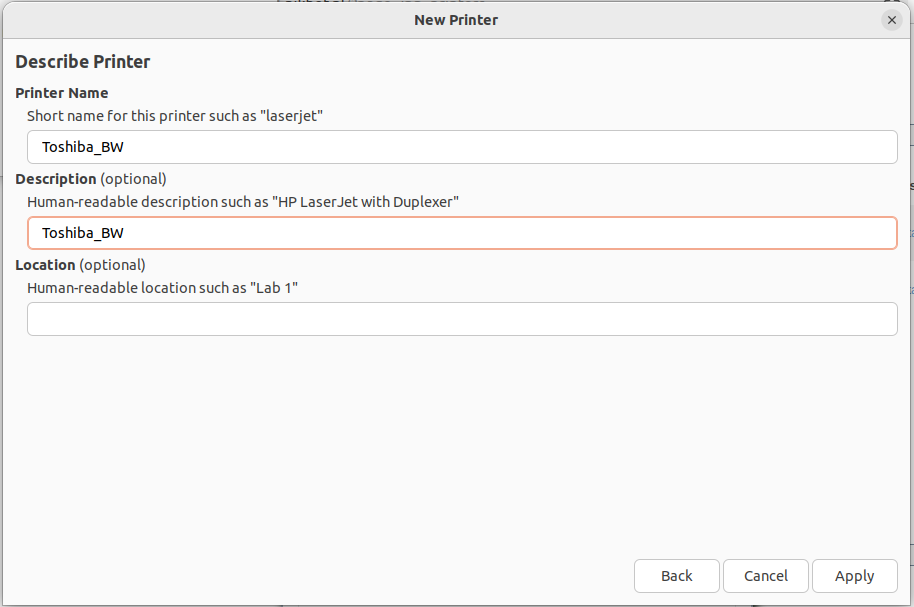
Select the model 'e-Studio 2500c' and click Forward.
-
Done!
18 March 2026 - Password notice
A known issue may prevent sign-in if your password contains certain special characters. Toshiba is aware of this issue and has not yet provided a fix. As a workaround, reset your password: https://sso.nikhef.nl/passwd/
Go to https://printportal.nikhef.nl/ and sign in using your Nikhef username and password.
Note: Your username should not include @nikhef.nl (for example: jdoe).
Should the instructions in other tabs not lead to a working printer configuration there are other ways on Linux to get you going. This might be caused by the PPD from openprinting.org. If that's the case please download the PPD below.
If you're having trouble importing the configuration into the OS or the local CUPS server you might try the following command:
If you're having difficulties regarding the default PPD file, there is another one available at https://business.toshiba.com/product/e-studio2525ac
Or just download the premade PPD from here: Toshiba-IPP-2520AC.ppd
Prerequisites
You will need to download and install the Toshiba printing drivers to follow the instructions below. Download them from the Toshiba driver page.Signing into the print portal
18 March 2026 - Password notice
A known issue may prevent sign-in if your password contains certain special characters. Toshiba is aware of this issue and has not yet provided a fix. As a workaround, reset your password: https://sso.nikhef.nl/passwd/
Go to https://printportal.nikhef.nl/ and sign in using your Nikhef username and password.
Note: Your username should not include @nikhef.nl (for example: jdoe).
Click Install Printers.
You will see both the Printer_BW and Printer_COLOR setups. Each queue must be added individually. We recommend setting Printer_BW as your default printer to avoid accidental colour printing. This queue overrides colour settings and prints in black and white.
Add a printer queue
-
Click Show details next to the Printer_BW (or Printer_COLOR) setup.
-
Click the highlighted button to copy the Printer URL.
-
Open your Mac’s System Settings.
-
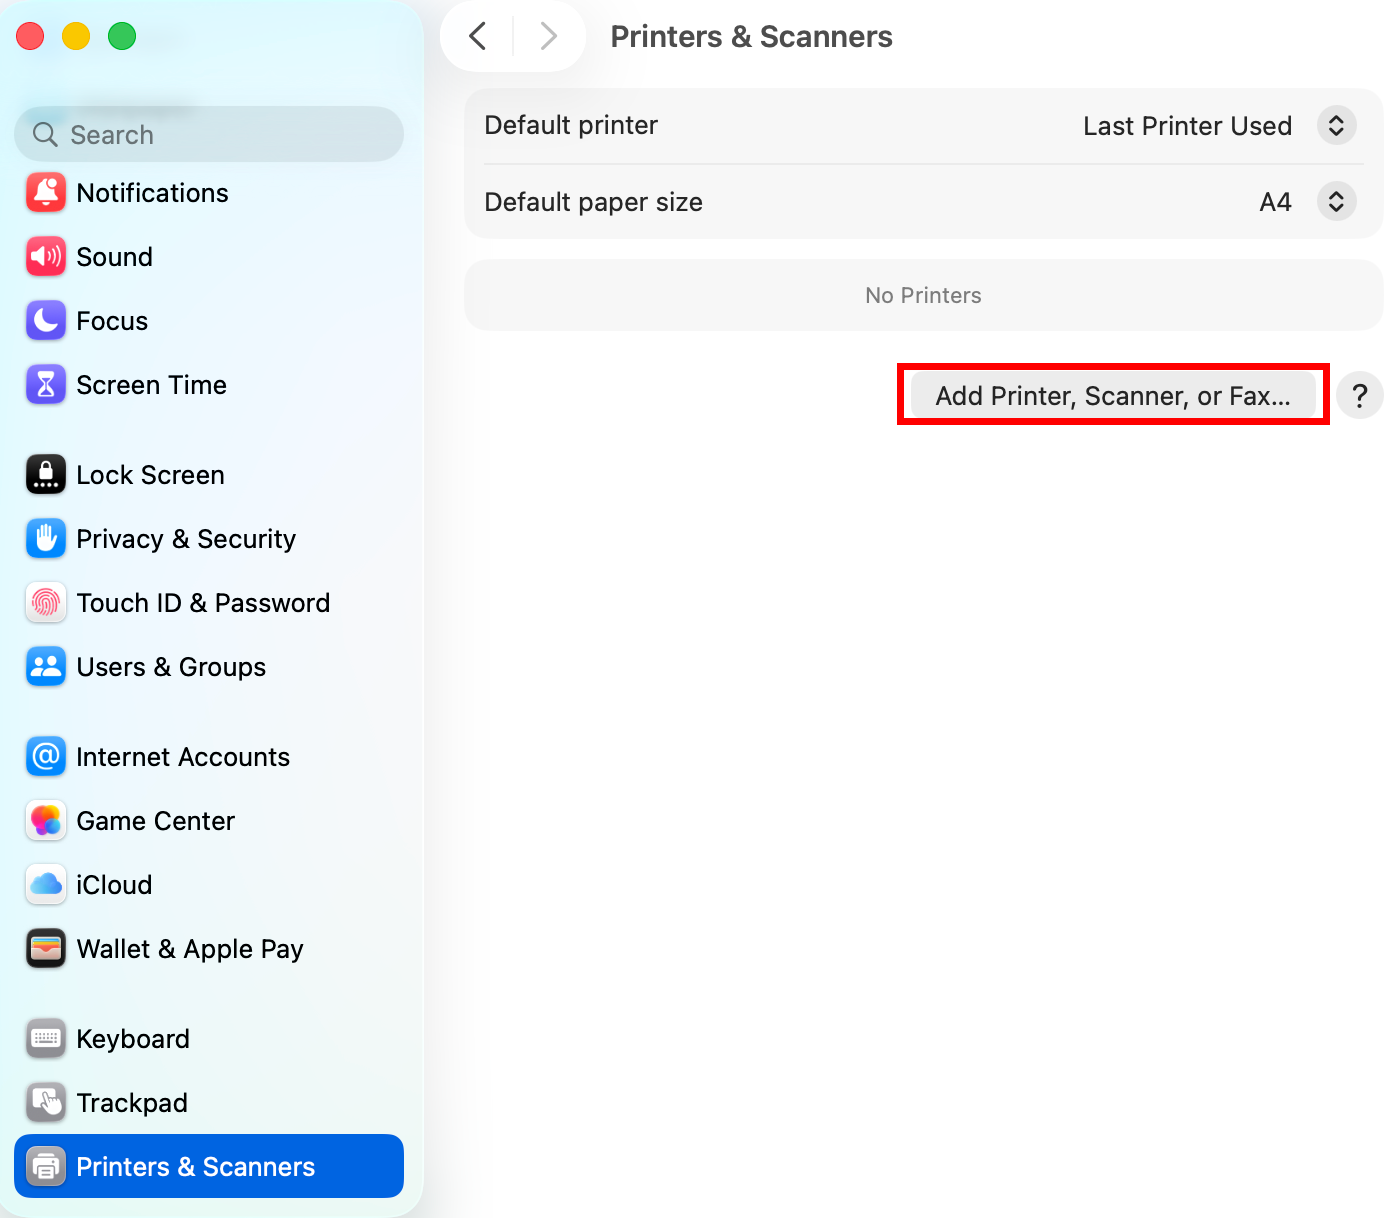
Select Printers & Scanners.
-
Click Add Printer, Scanner, or Fax....
-
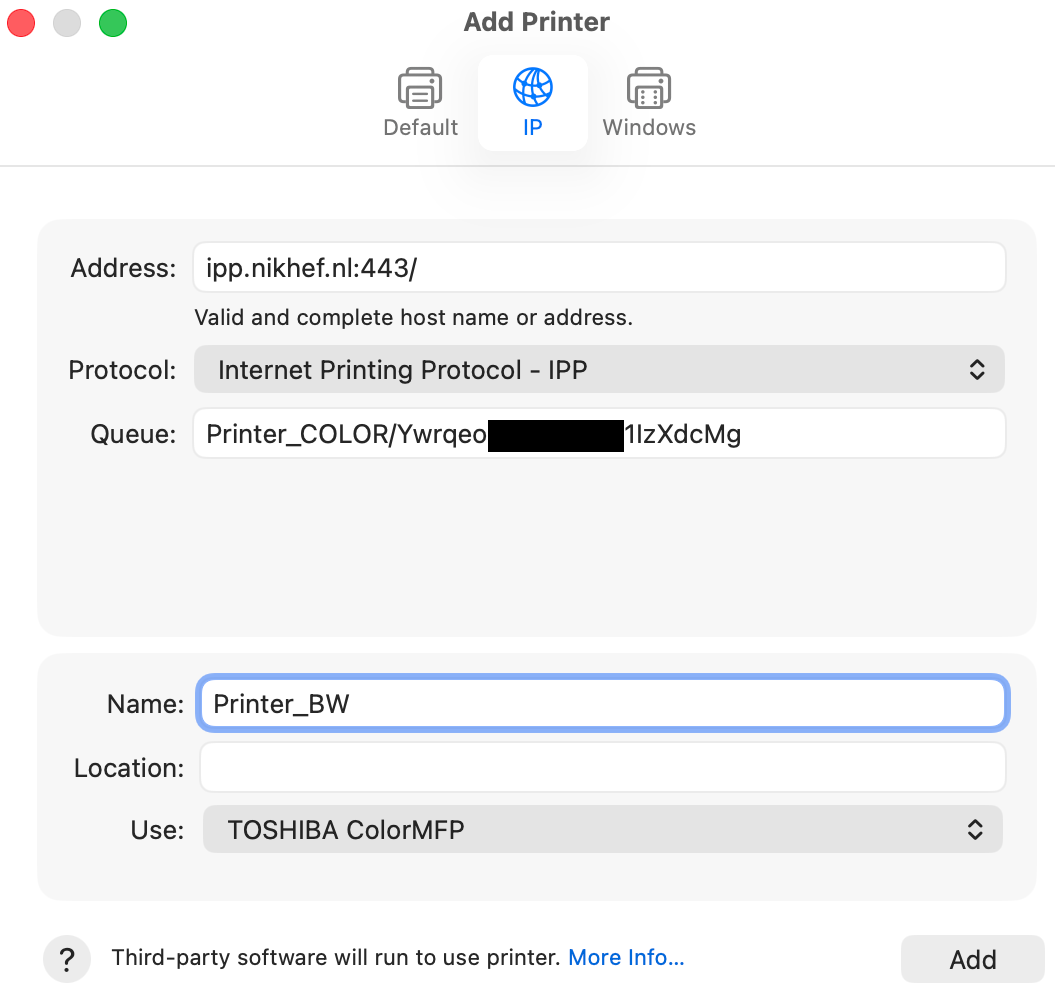
In the Address field, paste the copied URL.
- Remove https:// from the beginning of the URL
- Cut everything after 443 and paste it into the Queue field
-
Set Name to Printer_BW (or Printer_COLOR if adding the colour queue).
-
Next to Use, select Select Software..., then choose TOSHIBA ColorMFP.
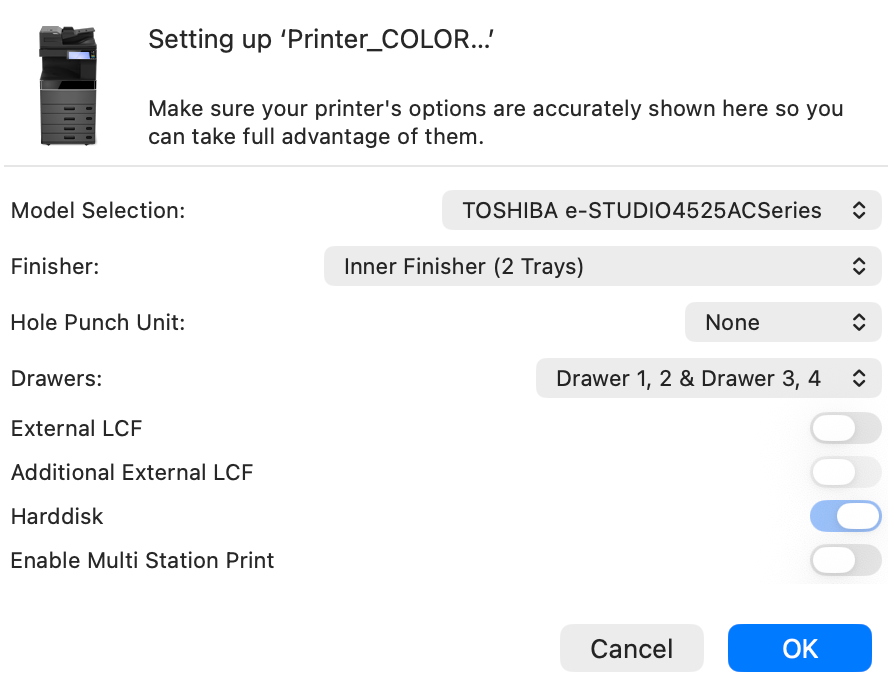
-
In the final window, under Finisher, select Inner finisher (2 trays), then click OK to complete the printer setup.
Signing into the print portal
18 March 2026 - Password notice
A known issue may prevent sign-in if your password contains certain special characters. Toshiba is aware of this issue and has not yet provided a fix. As a workaround, reset your password: https://sso.nikhef.nl/passwd/
Go to https://printportal.nikhef.nl/ and sign in using your Nikhef username and password.
Note: Your username should not include @nikhef.nl (for example: jdoe).
Click Install Printers.
You will see both the Printer_BW and Printer_COLOR setups. Each queue must be added individually. We recommend setting Printer_BW as your default printer to avoid accidental colour printing. This queue overrides colour settings and prints in black and white.
Add a printer queue
Click Windows Installer (.msi) next to the Printer_BW (or Printer_COLOR) setup and run the downloaded file as an administrator. 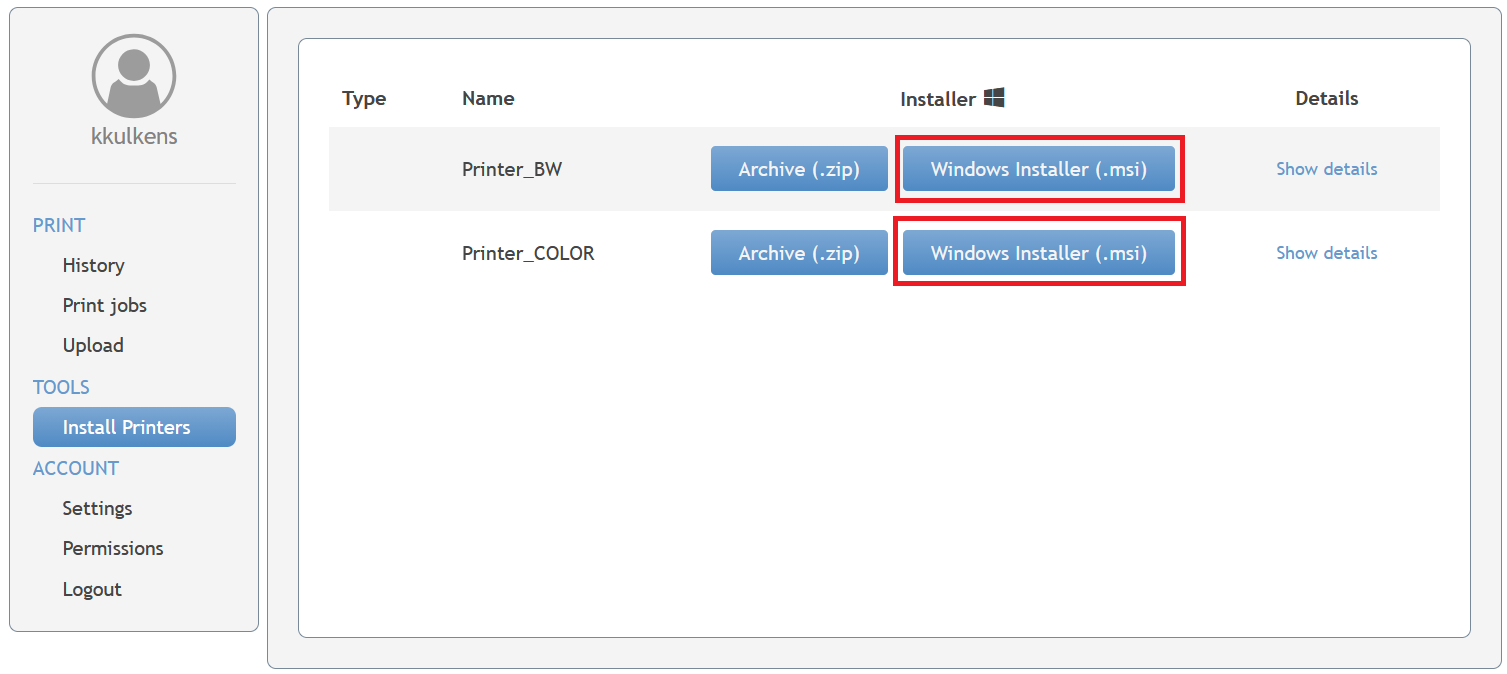
18 March 2026 - Notice to Windows 11 users
Windows 11 may display a SmartScreen warning when connecting to the printers. This is expected behaviour. When prompted, follow the on-screen instructions to continue (see below).
Windows SmartScreen may display a warning that you are starting an unrecognized app. Click More info, then click Run anyway. 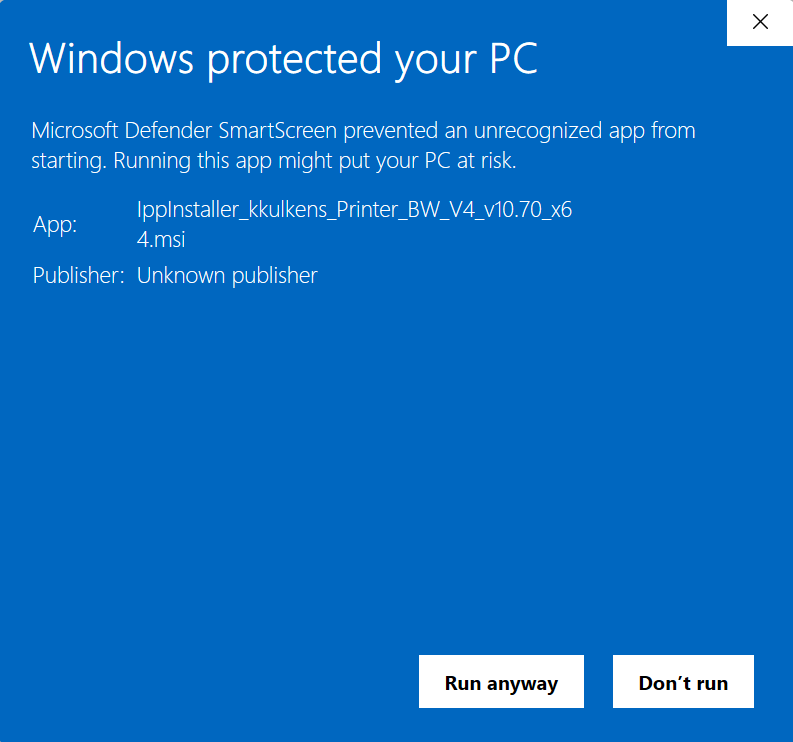
If you are using a Nikhef domain computer, Symantec Endpoint Protection may display a warning that the file cannot be verified. Click Allow this file. 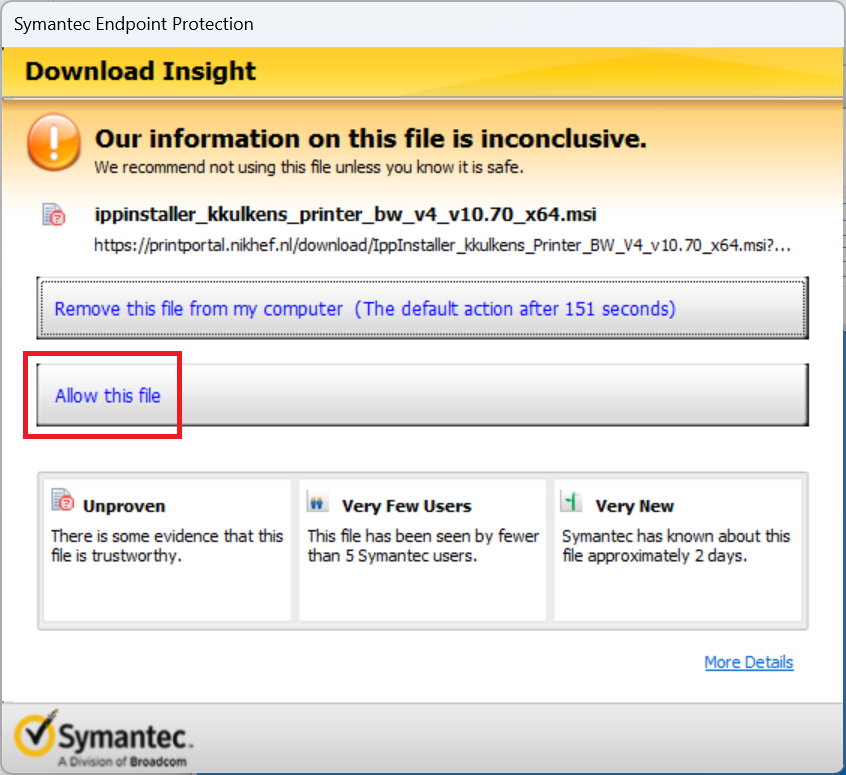
Usage
Printing
Print submitted jobs
All prints submitted to the Printer_BW and Printer_Color print queues are available on each printer. After logging in to the printer, you will see the printing screen. From here, you can view your print queue (Print job selection) or print all jobs immediately (Print all jobs).
Print From USB
To print from a USB device, press the Home button, then select USB Print. From the drop-down menu, select USB. Select your file, then press Print. You can use the preview option to easily locate the file you want to print.
Print from the printer webportal
You may also upload your documents directly to the printer portal, using https://printportal.nikhef.nl/?page=upload
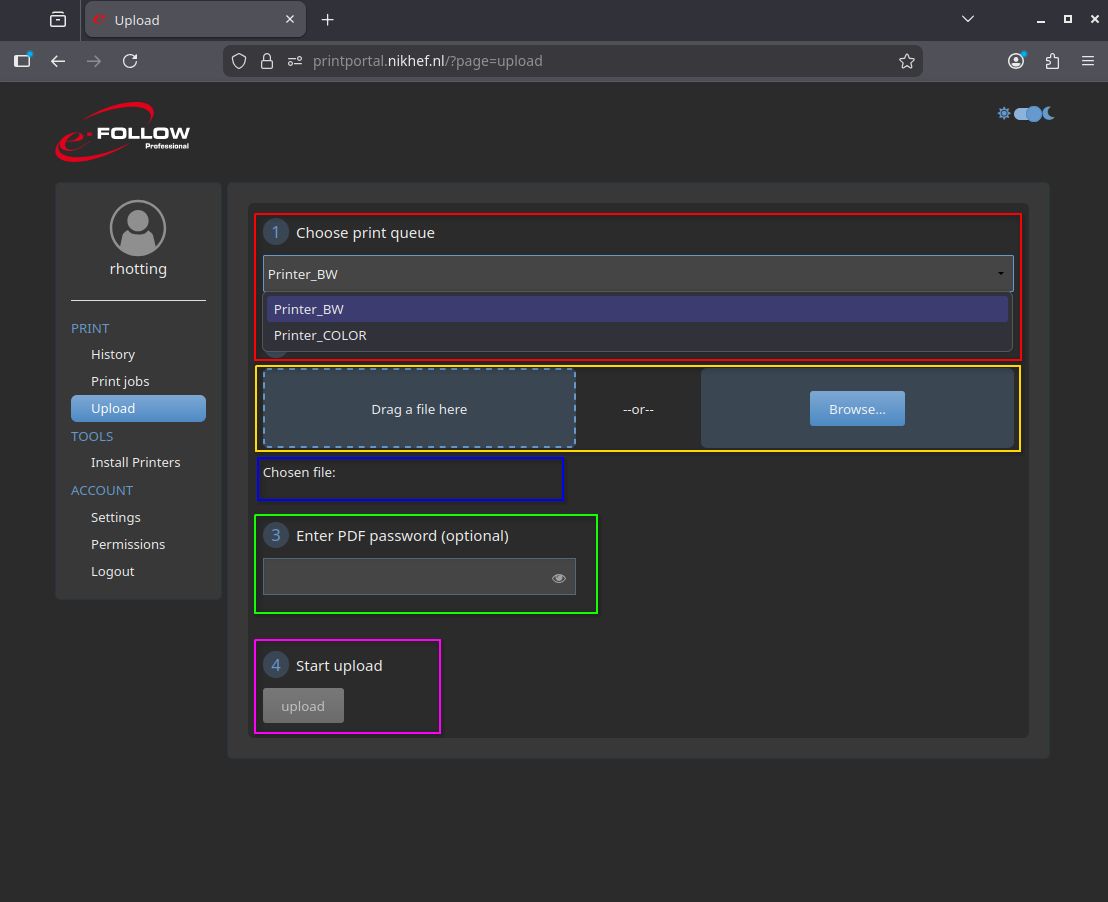
-
Select the right print queue using the drop-down menu, see the red rectangle.
-
After that, drag the file to the browser into the field that says 'Drag a file here' or use the 'Browse' button, highlighted by the yellow rectangle.
-
The file will be shown under the 'Chosen file:' field, highlighted by the blue rectangle.
-
If applicable, enter the PDF password, highlighted by the green rectangle
-
Start the upload by using the 'upload' button in the pink rectangle.
Copying
To copy, press the Home button once you've logged onto the printer. You then have the option to pick between Simple Copy, and regular Copy.
For most use cases, Simple Copy does exactly what you want it to do: you have a simple user interface allowing you to make one more copies of the original in the feeding tray or the scanner glass.
If this interface is too limited, use Copy instead, this gives you a couple extra options to pick (e.g. what paper tray you would like to use).
Scanning
To scan, press the Home button once you've logged onto the printer. You then have the option to pick between Simple Scan, and regular Scan.
Scan to email
To scan to your e-mail, select Simple Scan. This will show you a simple user interface allowing you to create a scan of the original in the feeding tray or the scanner glass, and send it to your email address.
Scan to network folder
To scan to a network folder, select Scan, this gives you an advanced user interface allowing you to choose where you would like to scan to. When you select Folder, the scan will go to \\nh.nikhef.nl\data\scan\yourusername.
Scan to USB
To scan to a USB drive, insert the USB drive into the USB port on the left side of the display. Then select Scan on the printer interface and choose USB as the destination.
About the Nikhef Print System
The Nikhef print system consists of Toshiba multi-functional printers and Follow-Me software. One type of printer is available:
- 12 x Toshiba e-STUDIO2525AC
All printers are able to print, copy, and scan documents in A3 and A4 format, single and double sided. Scans will be done in colour by default. The printers are located on all floors in the Nikhef H and N buildings. You need a valid access tag or iLoc key and a valid Nikhef computer account for copying, scanning, and Follow-Me printing.
Printing
There are different methods for printing.
Follow-Me
Printing at Nikhef uses a Follow-Me system.
All users with a valid Nikhef computer account and a valid Nikhef access tag or iLoc key can use Follow-Me. The Follow-Me system allows you to go to any of the 12 printers in the building and to print your documents with your access tag or iLoc key.
When you are done with printing, press the Logout button in the top right of the touch screen to end the session.
You can submit your print job to the following Follow-Me queues:
- Printer_Color (for color prints)
- Printer_BW (for non-color prints)
Note that a print job sent to a Follow-Me queue stays there for seven days, after which it will be automatically deleted from the queue.
Printing via email
You can send print jobs to the printers via e-mail. Send an e-mail with the document attached to print@nikhef.nl. The document will be added to your print queue and can be printed using the Follow-Me system.
Please note that:
- you need to use your Nikhef email address to send the email.
- this system is able to print most common file formats like pdf, jpg, png, doc, etc.
Available Printers
| Location | Description |
|---|---|
| Reception | e-STUDIO409AS |
| H0 | Toshiba e-STUDIO2525AC |
| H1 | Toshiba e-STUDIO2525AC |
| H2 | Toshiba e-STUDIO2525AC |
| H3 | Toshiba e-STUDIO2525AC |
| N0 | Toshiba e-STUDIO2525AC |
| N1 | Toshiba e-STUDIO2525AC |
| N2 | Toshiba e-STUDIO2525AC |
| N3 | Toshiba e-STUDIO2525AC |
| Secretariat | Toshiba e-STUDIO2525AC |
| Mailroom | Toshiba e-STUDIO2525AC |
| Pimu-Hall | Toshiba e-STUDIO2525AC |