GitLab
Aim: This page describes how to use the Nikhef GitLab service.
Target audience: We assume general familiarity with git. For git details, you can find a user guide here
Prerequisites
Registering
To participate in a GitLab project open https://gitlab.nikhef.nl in your browser and go through the registration process. An account will automatically be created during registration and you can begin to work right away.
For Federated SSO Accounts
If you have a Nikhef account or an account which is part of the Federated Login SSO, then you can simply log in with your normal credentials by clicking Federated Login
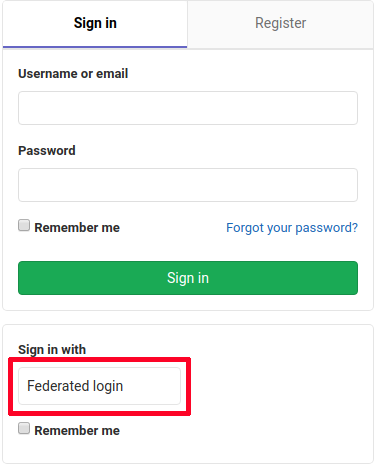
In the next screen, choose Nikhef IdP or find the correct one for your organization.
As Nikhef user you will automatically be able to create your own projects and you can be invited by others to join theirs. Accounts from third parties will have to be invited to a project before they can contribute. They will not be able to start their own projects.
For Third-Party Accounts
Note to Nikhef staff who want to include external third parties: Your project contributors must have an email address with a unique domain. No gmail, hotmail, gmx, yahoo, or other general public mail providers! To invite external parties, use the email invite function described below.
In case you are not a member of Nikhef or any other organization belonging to the Federated SSO, please contact your project liaison inside Nikhef and they will request the permission for you to register.
After you have received an invitation, use the Register tab to fill in your email address, username, and password.
You will then get a confirmation email which will take you through the sign-in process. Once you are logged in you can participate in any project you were invited to.
Instructions
User Setup
You will find all relevant settings for your account in the menu which you can access by clicking on the icon on the very top right of the web-interface. Most settings are optional, but you will have to submit an SSH key make commits, clones, push and pull requests possible. To do so use the SSH Keys feature in your User Settings on the left side of the interface.
As you can see, there is a link to instructions on how to generate SSH keys and where to find them. Please follow the instructions there if you do not know how that works.

Inviting Users to Projects
If you are maintainer of a project, you can invite users to participate. This can be done by accessing the Project Settings and selecting Members.
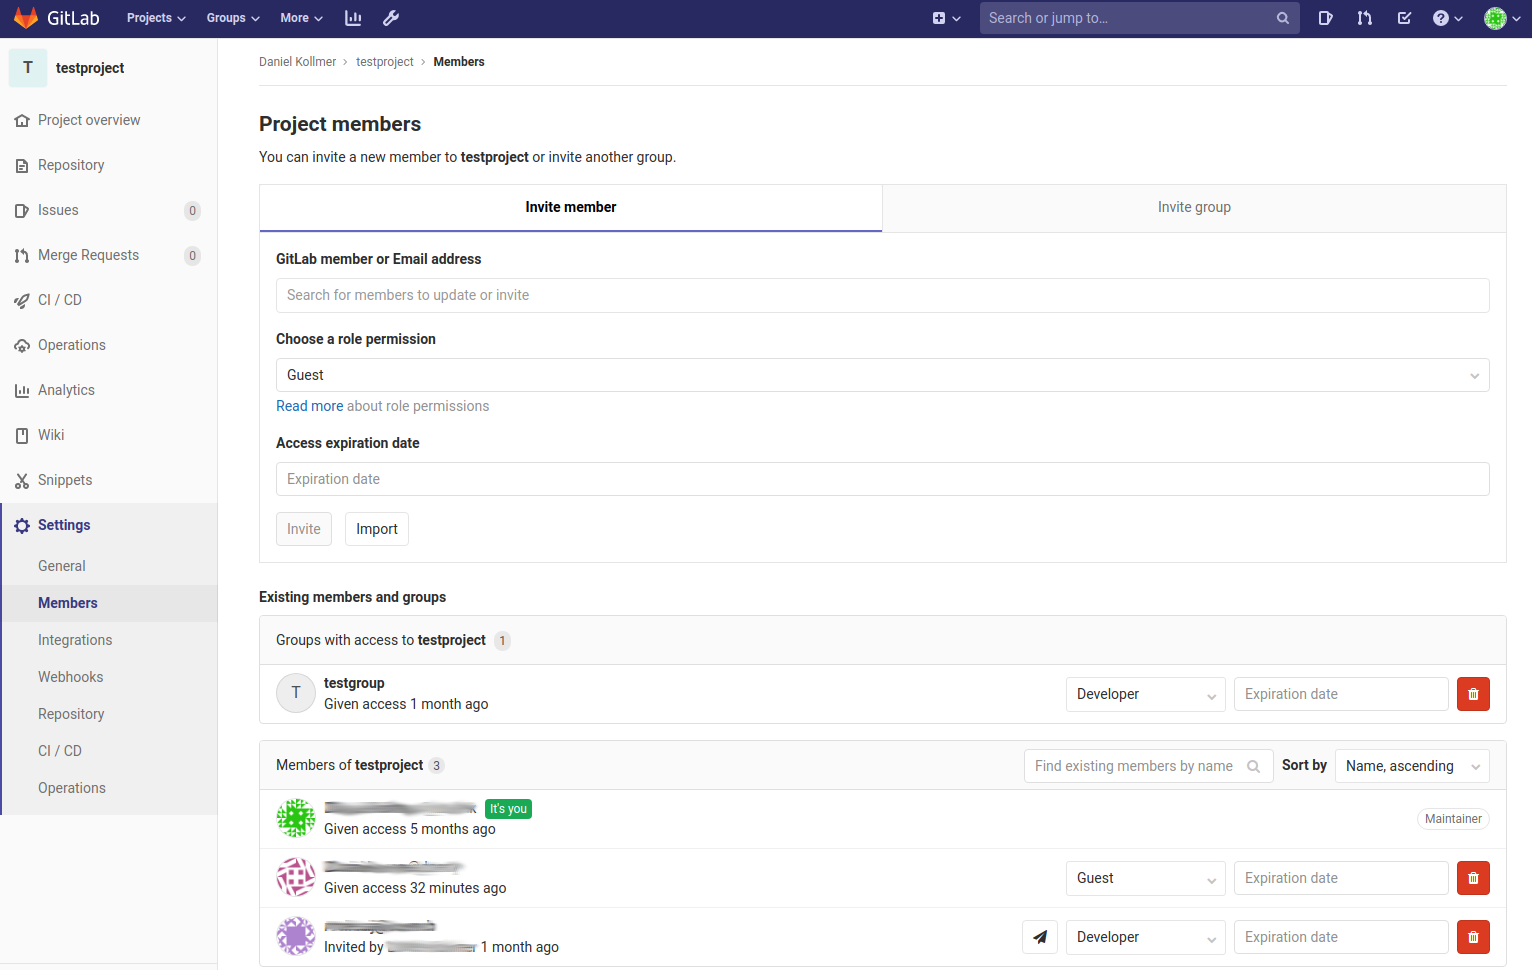
If you click in the field GitLab members or Email address you will get a drop-down menu of all users who are already registered. You can then choose a user to invite. Don't forget to set the appropriate privilege level for the user.
If you want to invite a user who does not have a GitLab account yet, enter their email address here and they will receive an invitation mail.
Before you invite a user, make sure they are either part of the Federated Login SSO or that their domain has been whitelisted for registration.
To request whitelisting of a domain, please contact the Nikhef Helpdesk for assistance (e-mail: helpdesk-at-nikhef.nl / phone ext. 2200 / Room: H122)
Usage
Mattermost Group chat Integration
Creating Mattermost Chats
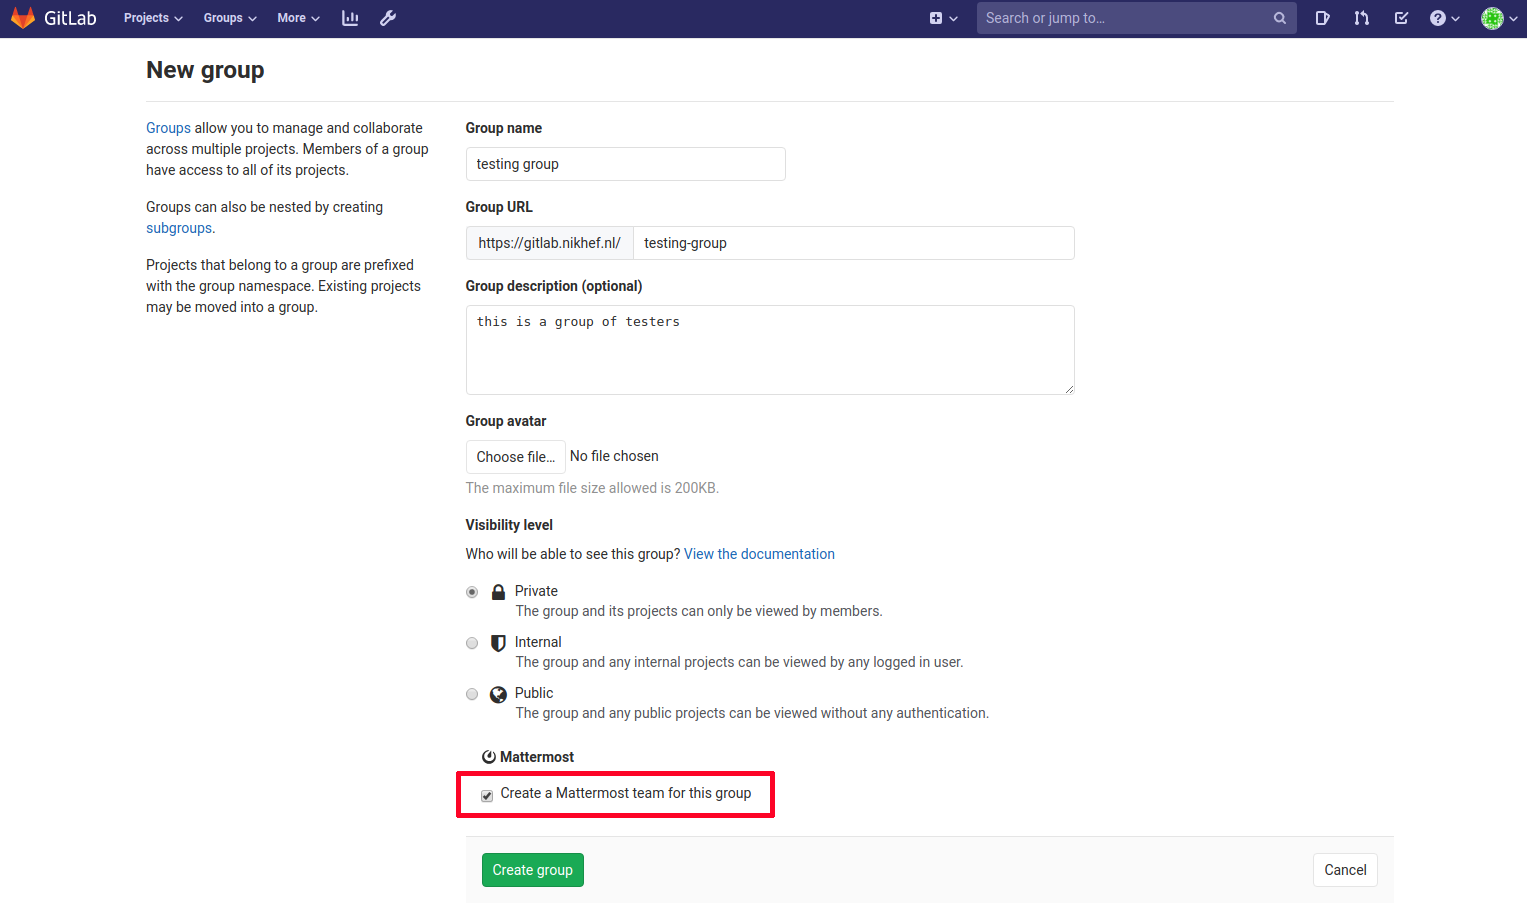
This function is available when creating or editing a Group in GitLab. You can create Groups under the Groups menu by choosing Your Groups and New Group in the next window. You will see the option to create a Mattermost chat for this group all the way down like in this screenshot:
Opening the URL https://mattermost.nikhef.nl/login will then show the option Sign in with GitLab. Clicking on that button will open a GitLab login page which then hands over the user to Mattermost where they will automatically join the group chat.
Activating GitLab Notifications in Mattermost
It is possible to send notifications from GitLab Projects to any Mattermost chat channel. Sign in to Mattermost and complete the following steps to do so:
- From the channel menu in Mattermost choose Integrations and then Incoming Webhooks

- Click on Add incoming Webhook and fill in the fields according to your preferences. Finally click Save
- Copy the URL on the Setup Successful page and click on Done
Now sign in to GitLab and continue as follows:
- Open the project for which you want to include notifications
- Open Settings --> Integrations and scroll down the list until you find "Mattermost notifications"
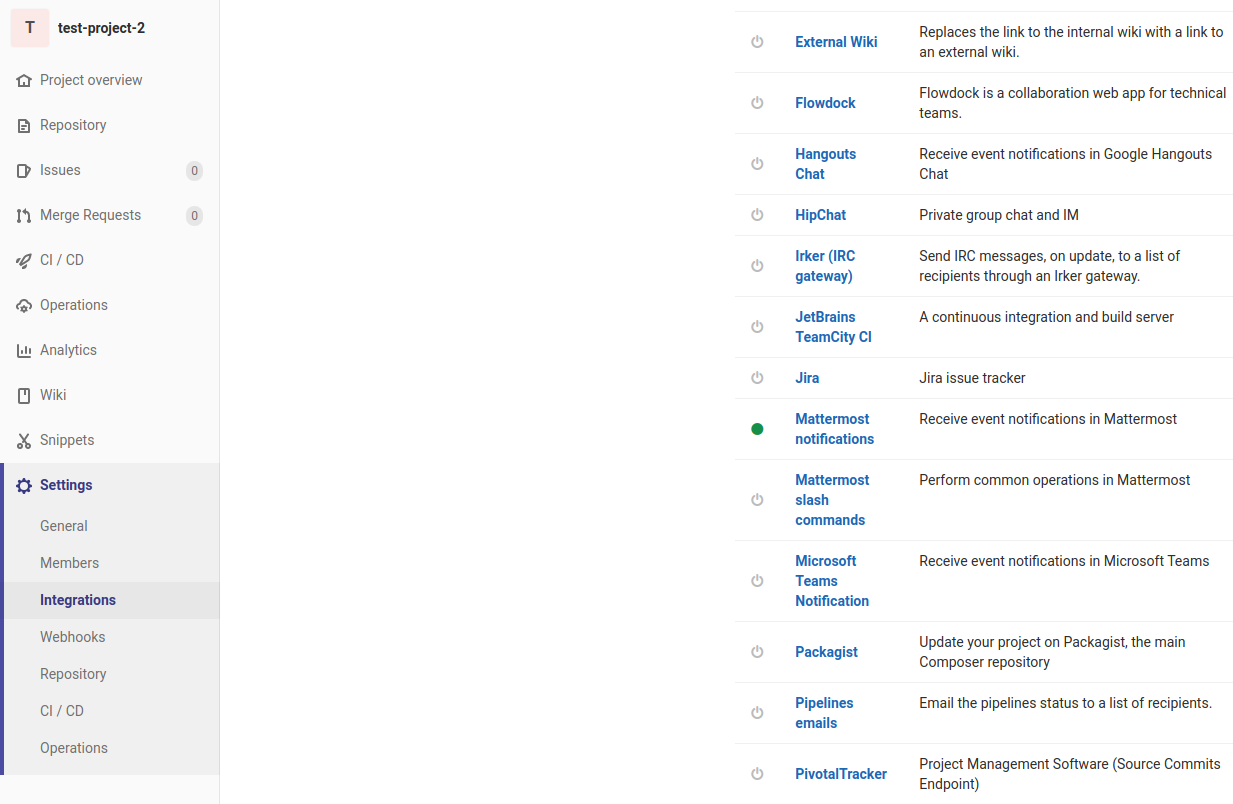
- Click the Active checkbox and then choose all Trigger options according to your wishes.
- Scroll down until you find the field Webhook Paste the URL you obtained from step 3 on the Mattermost server into this field. Note: You do not have to fill in a username
- Finish with Test settings and save. You will now receive all chosen notifications from your project in the Mattermost chat channel.